
I didn’t get the ultimate coat of polyurethane on the flooring final evening earlier than I went to mattress. As y’all know, I typically don’t do a number of work on Wednesdays as a result of that’s my lunch day with my mother and brother, and I normally don’t get house till about 4:15. Then I spend a minimum of an hour making Matt’s dinner, spending time with him as he eats, and so on. So if any work will get completed on Wednesdays, it gained’t be till after 6:00pm.
By the point I bought house, the primary two coats of poly had been totally dry, and the subsequent step within the course of was to evenly sand the flooring earlier than the ultimate coat went on. I had forgotten to purchase the right sandpaper once I was shopping for all of my provides for the flooring challenge, so I needed to go to the shop first, which put my beginning time round 7:30. Sanding the flooring took about two hours, after which cleansing up the entire mud and preparing for the ultimate coat of poly took one other hour. Beginning the ultimate coat of polyurethane at 10:30pm merely wasn’t an choice. However a minimum of the flooring are prepared for that closing coat this morning, and I nonetheless assume I may be on schedule to begin the closet tomorrow.
Anyway, I wished to again up a bit and provides some extra particulars of this course of as a result of I had just a few questions concerning the merchandise and course of. First, I need to make it very clear that mixing polyurethane and stain collectively is one thing you’ll want to do at your individual threat. I can’t assure that your end result goes to be like mine, so if you wish to do that, please take a look at out the combination on some leftover wooden earlier than really making use of it to your hardwood flooring.
I like to combine the stain with the polyurethane, particularly with a wooden like new development crimson oak hardwood flooring that has such darkish and visual grain, as a result of it evens out the looks of the grain and provides a fantastic depth of coloration to the wooden. I’ve solely ever completed this utilizing darkish stain, although. So I do not know how it will work with a lighter stain.
Right here you possibly can see the distinction the primary coat made on my flooring. The shiny half is clearly the half the place I had simply utilized the stain/poly combination, and you’ll see the way it compares to the a part of the flooring within the foreground of the image that simply has the stain on it.

Right here’s a have a look at the distinction it made within the closet. Do not forget that this room has lots much less lighting, so it seems that the poly/stain combination made much more of a distinction in right here, however that’s simply due to the poor lighting within the room. The ground is all the identical coloration all through the bed room suite.

Merchandise I used:
To stain the flooring, I used Minwax oil-based stain, and I used a 50/50 mixture of Darkish Walnut and Particular Walnut. The polyurethane I used is the oil-based Minwax Tremendous Quick Drying Polyurethane For Flooring in a satin end, and for the primary two coats, I blended the poly and stain in a ratio of 1 gallon of polyurethane to at least one pint of stain (utilizing the identical 50/50 stain combination that I had beforehand used to stain the flooring).

To use the stain, I used a big 4-inch brush that was labeled to be used with oil-based stain/poly (like this one) taped to the tip of a pole utilizing Tyvek tape (duct tape will work simply effective) in order that I might stand for the method relatively than having to get down on my knees to polyurethane the flooring. You’ll discover that this isn’t the type of brush made for staining decks. I personally assume these are a bit too cheaply made for staining/polyurethaning indoor hardwood flooring.

Why I used a brush as a substitute of an applicator pad
These 10- or 12-inch applicator pads (wool or artificial) which can be typically used to use polyurethane to a flooring are excellent for those who’re simply making use of clear polyurethane proper out of the can. Clear polyurethane is rather more forgiving, so for those who apply some areas thicker than others (which can inevitably occur with these applicator pads), it actually gained’t make a distinction within the completed look of the ground.
However when stain has been added to the polyurethane, it makes an enormous distinction. If the polyurethane/stain combination isn’t utilized very evenly, or there are areas the place the pad pushes the poly right into a line the place you cease and begin the applying, it will likely be very apparent as a result of that space shall be darker because it has a buildup of polyurethane with the colour added.
The applying is way simpler to regulate with a brush. I utilized the poly in sections that had been about 3 or 4 toes broad in rows that had been about 2 toes, and utilizing the comb allowed me to feather every new part into the moist polyurethane from the earlier part with out leaving any buildup of coloration the place the 2 sections met. The identical idea applies with the overlapping rows. The comb allowed me to feather every new row into the prior row whereas it was nonetheless moist with rather more management that an applicator pad would have allowed. The outcome was even coloration over the entire flooring with no buildup of coloration (reminiscent of traces left by the ends of the applicator pad) leaving darker areas wherever on the ground.
It’s positively a slower course of making use of it with a brush as a substitute of an applicator pad, however I feel it’s a essential course of when making use of polyurethane with stain added to it.
I discussed yesterday that I did two coats of the poly/stain combination. You possibly can see right here the distinction that the second coat made within the depth of coloration.

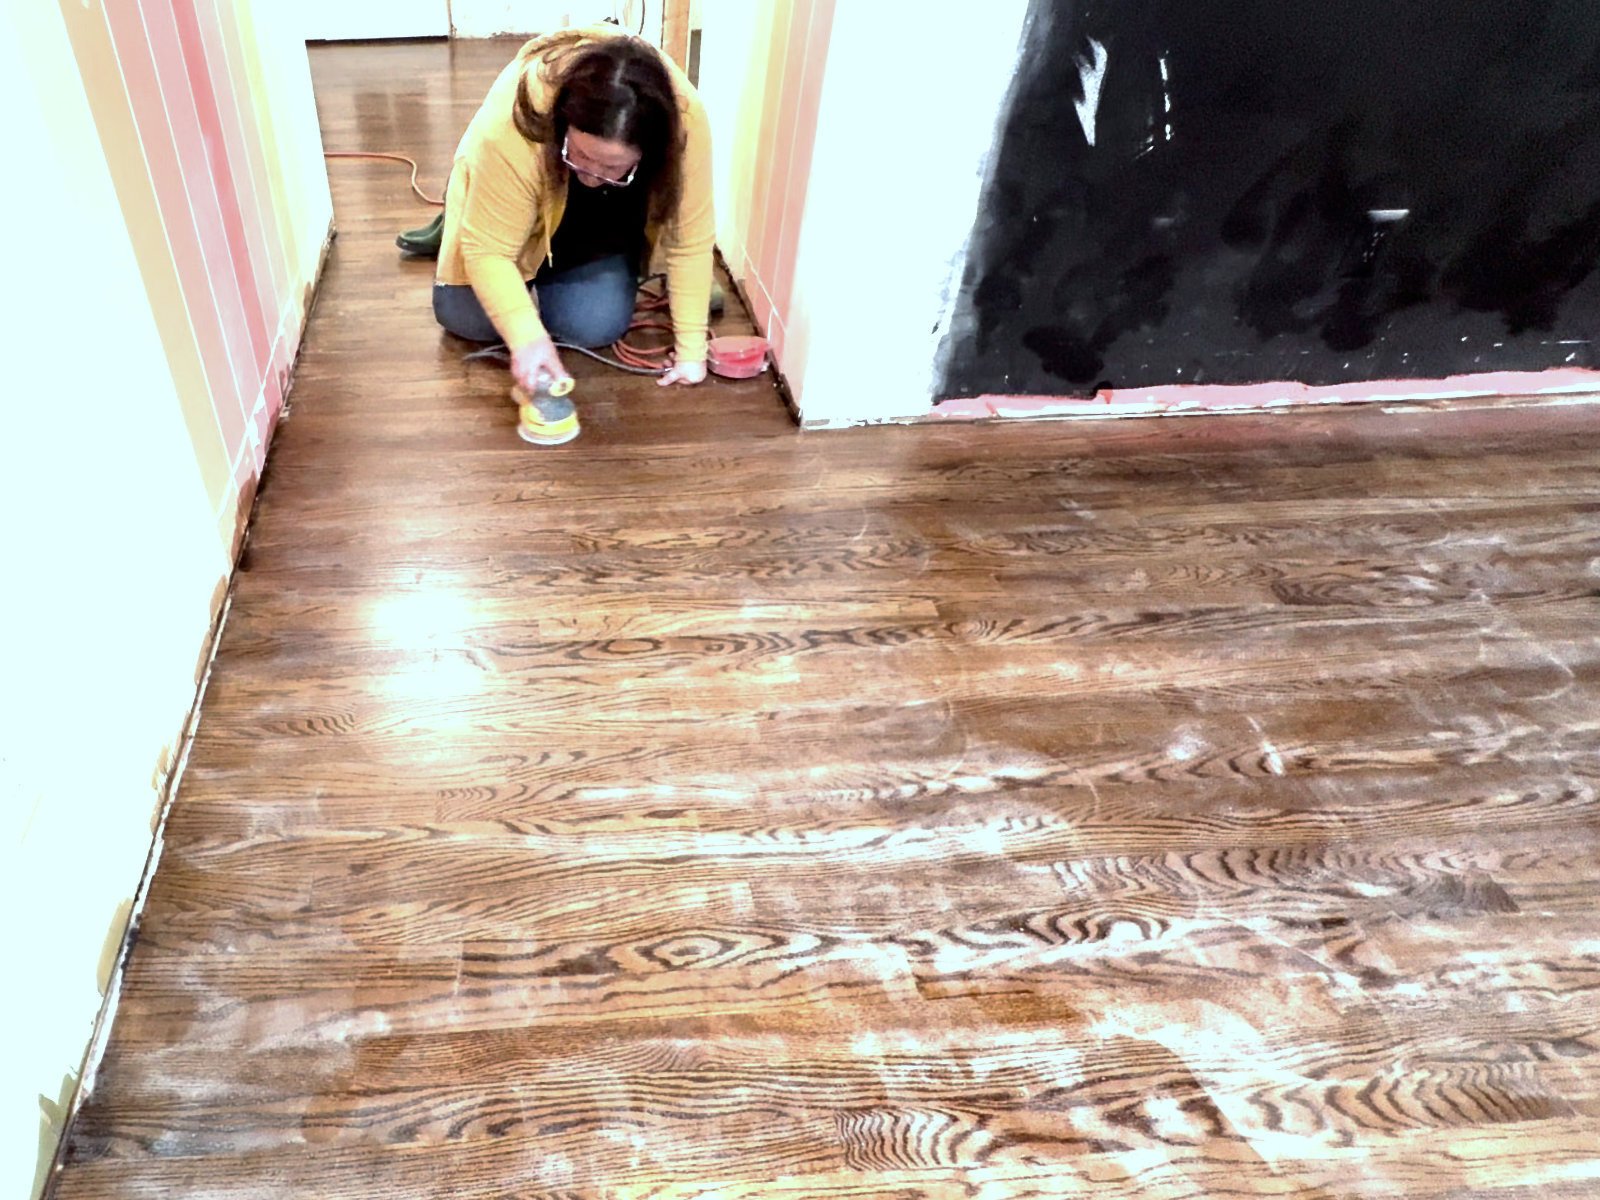
That brings us to yesterday, the scariest a part of the entire course of. It’s a bit nerve wracking to take a sander to a flooring that appears actually fairly, nevertheless it’s additionally a essential step earlier than the ultimate coat of polyurethane with the intention to get the very best closing end result and the smoothest flooring doable. Utilizing my 5-inch orbital sander set to the bottom setting, and 220-grit sanding discs, I sanded your complete flooring, ensuring that I used even strain and didn’t go over any of the sections a lot that it will take the colour off.

And sure, as soon as once more, this complete course of was completed on my knees. It wasn’t too unhealthy, although.

However let me inform you, it’s scary seeing the ground go from trying like this…

to trying like this…

However I simply trusted the method. The 220-grit sanding discs refill with mud pretty rapidly, so I needed to change them typically. And most of that mess is only a buildup of mud, so as soon as the mud was cleaned up, the flooring went again to trying just about like they did earlier than sanding. Solely now, they had been a lot smoother.
As soon as all the pieces was sanded, I vacuumed up as a lot of the mud as I might with my store vac, after which I cleaned up the remainder with a humid rag. Right here you possibly can see the distinction between the ground that had been wiped down and was beginning to dry (so it began trying hazy once more) on the highest proper portion of the picture, the ground that had simply been wiped down and was nonetheless moist within the little hallway, and the ground that hadn’t been wiped down but on the left portion of the picture.

When cleansing up the mud with a humid rag, it’s necessary to concentrate to what it appears like when it’s moist, as a result of that’s just about what it’ll appear like after that closing coat of polyurethane goes on. However as soon as it dries, it’ll return to trying hazy once more, with some areas trying hazier than others. That’s not an issue, although, as a result of the ultimate coat of clear polyurethane will even out the entire end. Right here’s what it appeared like as soon as it was sanded and dry. You possibly can see that some areas seem hazier than others.

And right here’s the closet flooring sanded, wiped down, and dry.

And the lobby flooring sanded, cleaned, and dry.

As I used to be wiping down the flooring with the damp rag, I observed that I did find yourself with three very small (penny-sized) spots the place I took off a bit an excessive amount of of the colour. I’ll merely contact these up with a tiny little bit of stain and allow them to dry earlier than including the ultimate coat of polyurethane. So the flooring are trying a bit tough proper now, however once more, it’s necessary to concentrate to what they appear like once they’re moist as you’re wiping off the mud. That’s when you possibly can actually see what they’ll appear like as soon as that closing coat of polyurethane goes on.
So I’ll do the ultimate coat this morning and provides the flooring all day and all evening to dry. This afternoon, I’ll make my procuring record and lower lists for the closet cupboards. The plan is to get the flooring coated tomorrow morning after which get began on my closet tomorrow afternoon!

Addicted 2 Adorning is the place I share my DIY and adorning journey as I transform and adorn the 1948 fixer higher that my husband, Matt, and I purchased in 2013. Matt has M.S. and is unable to do bodily work, so I do the vast majority of the work on the home on my own. You can learn more about me here.
Trending Merchandise


![Rustic Grey Mason Jar Sconces for Home Decor, Decorative Chic Hanging Wall Decor Mason Jars with LED Strip Lights, 6-Hour Timer, Silk Hydrangea, & Iron Hooks for Home & Kitchen Decorations [Set of 2]](https://m.media-amazon.com/images/I/41DPf4UgGOL._SS300_.jpg)
