
I nonetheless want to color the baseboards, however so far as the ornamental parts on the massive studio wall go, these are lastly completed! I used to be decided to get all of this stuff completed this final weekend in order that I may transfer on to one thing else this week (like portray my work tables or giving my desk a makeover), so I put in some lengthy days to get it accomplished, and I had such a very good time doing it.
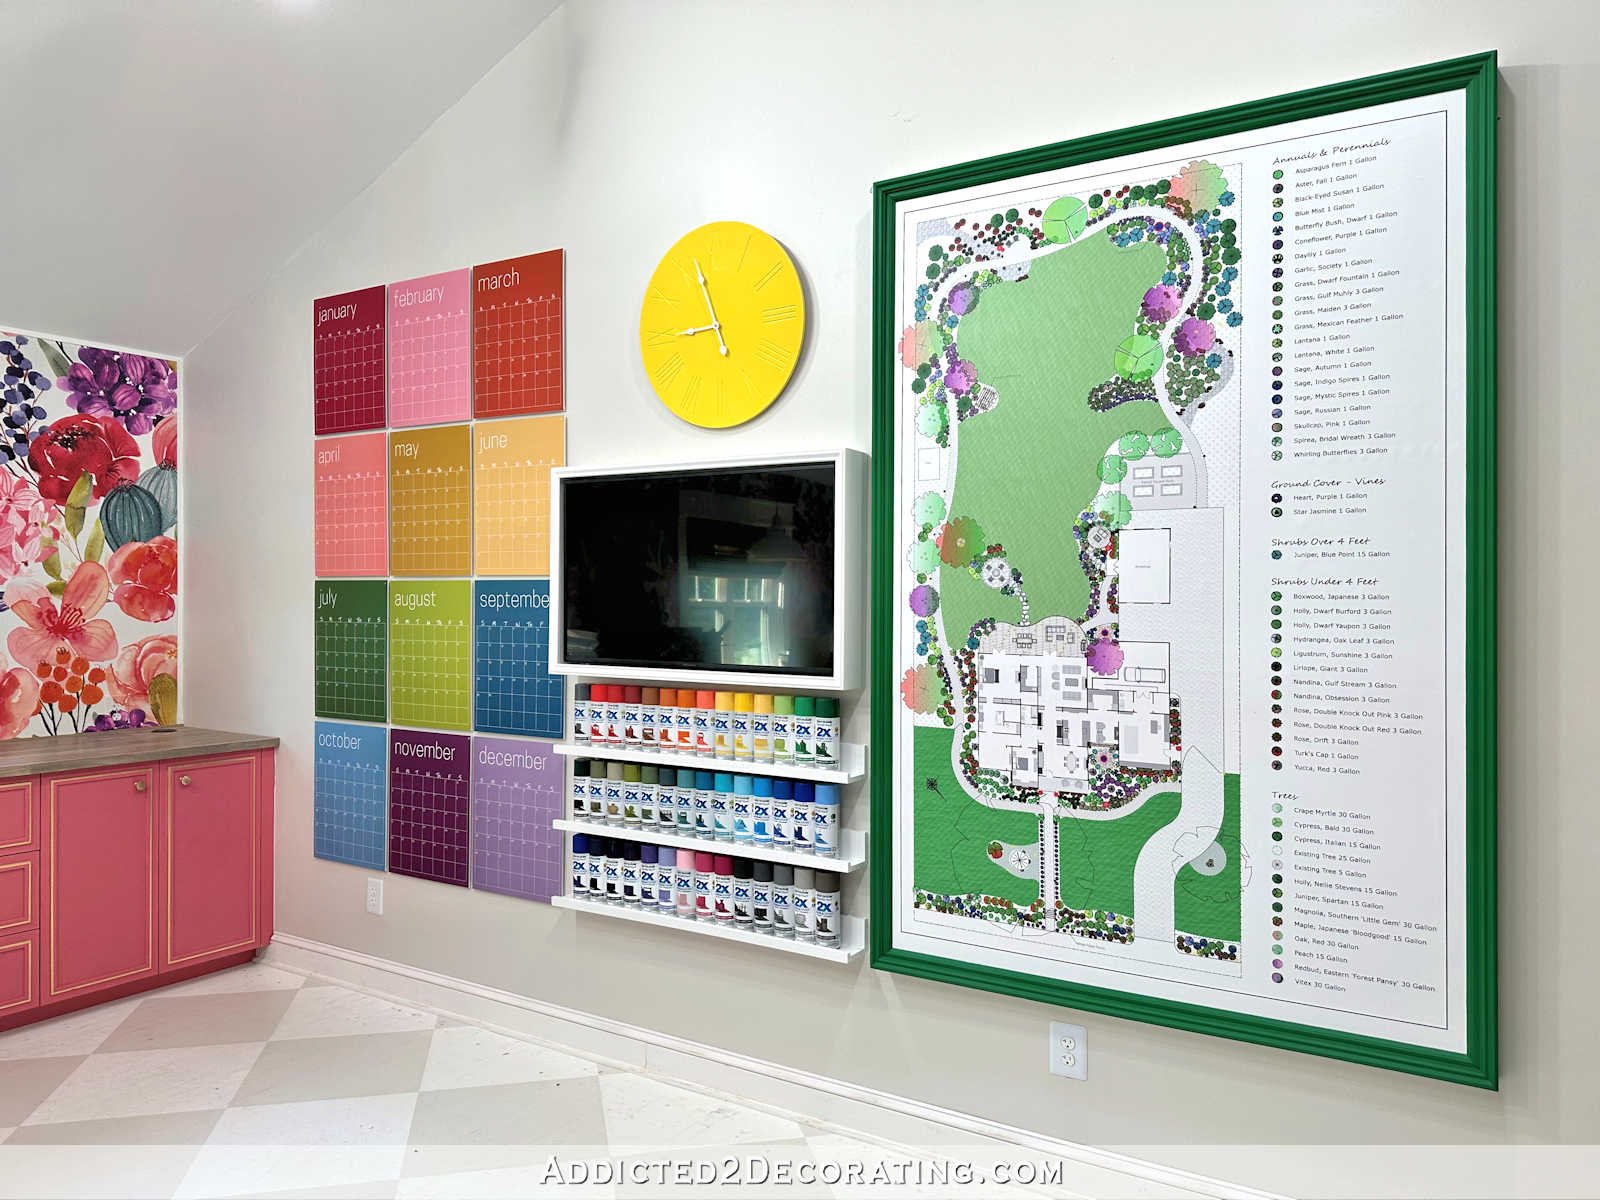
First, let me remind you what the wall seemed like on Friday after my day of fails. Eleven of the twelve months of my calendar had fallen off the wall. I had made my TV body method too massive. I needed to do a makeover on the clock, however I couldn’t work out what I needed to do. And the cabinets have been giving me issues.

However every part is completed now, and that is what the wall appears to be like like. I’ll most likely transfer the TV up on the wall about three inches (if I can, but it surely’ll rely upon the outlet behind the TV). However aside from that, the ornamental gadgets on this wall are completed.
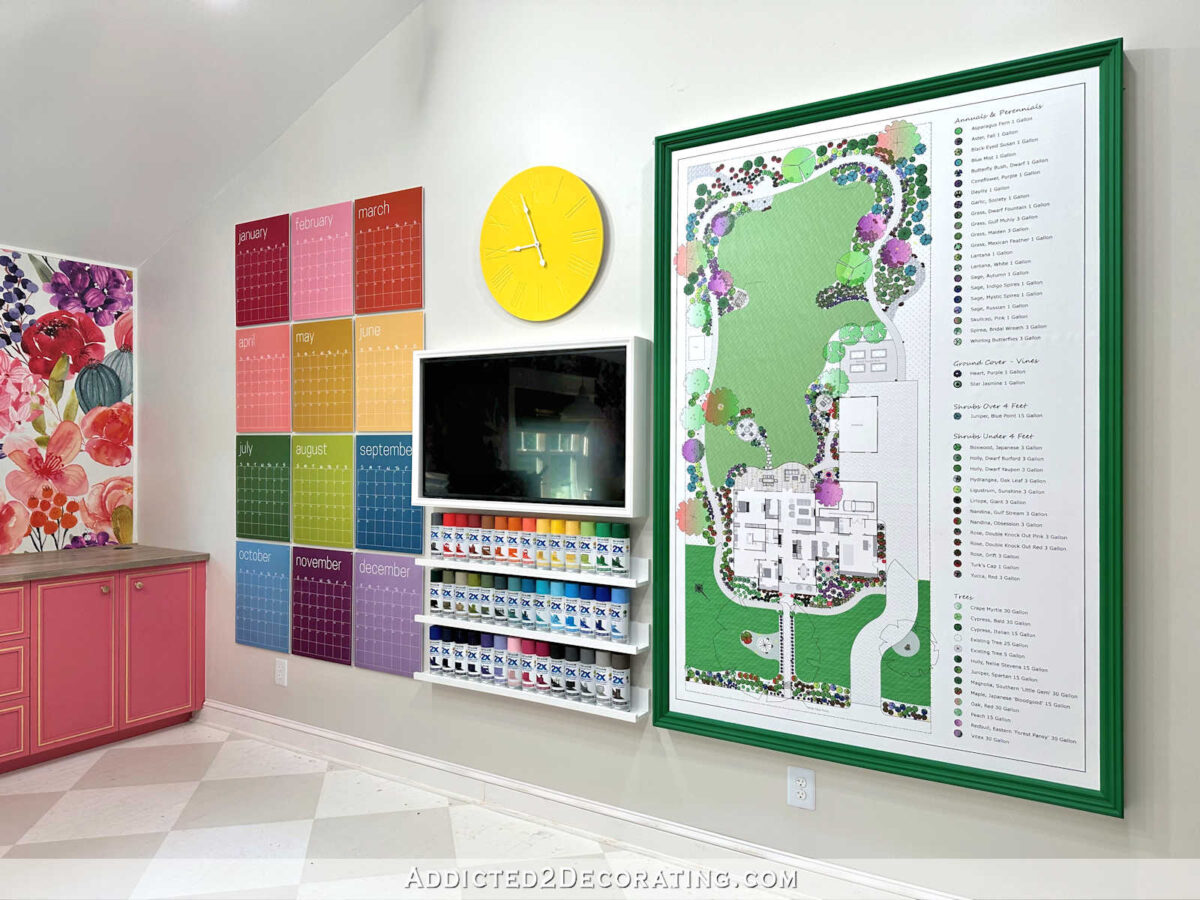
The star of the wall is the massive print of our panorama design. I can’t even rely the variety of instances I’ve walked into this room and simply stood and stared at this lovely print. I really like with the ability to see the plant key and simply discover these crops on the plan. I discover that just about not possible to do once I’m wanting on the plan on my pc.

Mounting and framing a print this dimension was no easy activity. I imply, it wasn’t troublesome in any respect, but it surely wasn’t fast. It took a number of days to get it accomplished, however I’m so extremely pleased with the way it turned out.
Under the TV, I needed so as to add cabinets. I had initially deliberate to make my on cabinets, however then I discovered these cabinets on clearance at Lowe’s for $12 every, so I opted for the straightforward route.

However in the long run, I didn’t like how prime heavy the narrower cabinets made that part look, so I went again to my authentic concept and I made my very own cabinets to suit the width of the obtainable house. I believe these match so significantly better and make the realm look extra balanced. I’ve one other concept for the Lowe’s cabinets. They’ll make an look in a special room.
I made these cabinets in the very same method that I made the image ledges for the breakfast room with one distinction. On the breakfast room cabinets, I used 1-inch lumber (which is definitely 3/4-inch thick).

I like how these turned out, however I needed the studio cabinets to be extra just like the Lowe’s cabinets that I purchased, and people are made out of 1/2-inch materials. So earlier than placing the studio cabinets collectively, I ran the entire boards by means of my planer twice to airplane them all the way down to 1/2-inch thick. However aside from that, the remainder of the method was the identical.
After I determined to place cabinets underneath the TV, I didn’t know precisely what I needed to make use of them for, however I knew two issues. (1) I needed the cabinets to carry one thing helpful, and never simply be image ledges to carry ornamental issues, and (2) I needed the cabinets to carry one thing very colourful.
It is a studio, and once I consider colourful gadgets which might be utilized in a studio, my thoughts goes to color. I’ve cabinets full of latex paint within the sunroom, however to ensure that that paint to suit onto slender cabinets, I’d need to switch all of that paint into jars. However then the jars wouldn’t maintain the entire paint, so I’d nonetheless be left with gallon containers that should be saved, after which the jars of paint would actually solely serve ornamental functions. That appeared like a waste.
Then I considered craft paint. I’ve an enormous field full of bottles of craft paint. However they wouldn’t actually be fairly displayed out within the open since they’re all totally different manufacturers, totally different sizes, and so forth.
After which I took one other have a look at my cabinets within the sunroom, and the reply grew to become apparent. Spray paint! I LOVE spray paint, and on the subject of shopping for colours, I virtually at all times purchase one model. About 98% of the time, I’m fairly loyal to Rust-Oleum Painter’s Contact from Dwelling Depot. (I enterprise out to different manufacturers on the subject of metallic paints or specialty paints.)
The entire Rust-Oleum Painter’s Contact cans are uniform in dimension, I’ve a ton of colours, I exploit spray paint usually, and so they look fairly lined up on cabinets. At the least they do to me! That possibility simply appeared to take advantage of sense to me. So I made the cabinets particularly to carry my assortment of spray paint, organized in rainbow order for probably the most half. And also you higher consider that I took this chance to make a visit to Dwelling Depot and purchase spray paint colours that I wanted to fill within the holes within the rainbow assortment for my cabinets. 😀

After which there’s the TV body. I ended up having to remake the TV body not simply as soon as, however TWICE!! I do not know what my downside was, however I simply stored messing up on the measurements. Thank goodness I stored making it too massive, so I may reduce down what I had.

The TV body I made for the studio wall is kind of a bit smaller than the opposite ones I made. The one for the breakfast room wall is fairly thick, and I believe it matches completely with the image body ledges full of colourful art work.
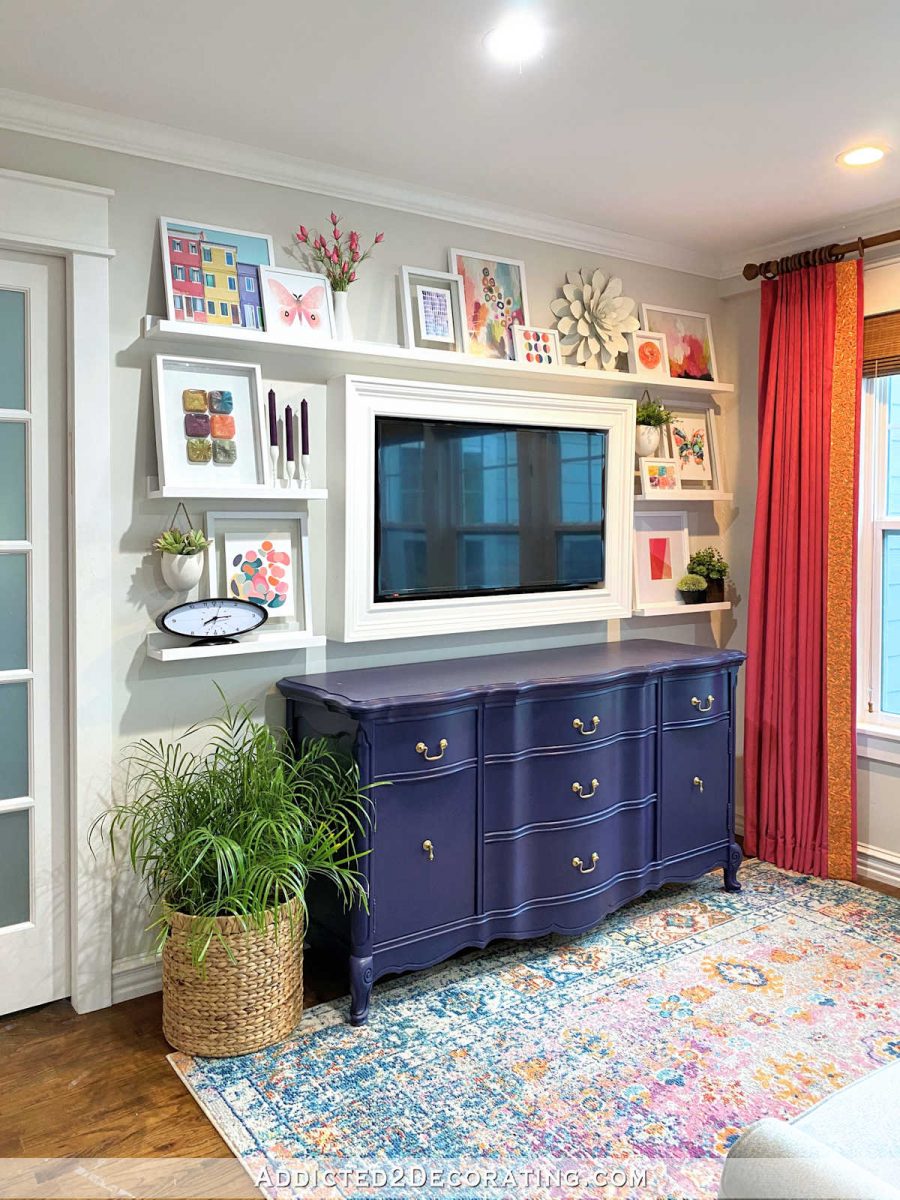
However for the studio wall, not solely did I not have room for such a thick, chunky body, however I additionally simply needed one thing a lot thinner and understated.
The clock is one which I bought on Amazon. You can find it here (affiliate hyperlink). The clock initially seemed like this…

I wasn’t on the lookout for a farmhouse type clock. That’s not likely my type. However I purchased this one as a result of I knew I may work with it. I preferred the scale and the routed Roman numerals. And no, I couldn’t have made this myself. Or perhaps I may have, however it will have taken me two days to purchase the plywood, reduce the right circle, after which attempt my hand at utilizing my router to route these excellent Roman numerals into the plywood. I most likely would have tousled on at the least the primary one, which implies re-cutting the circle, and beginning over. So paying $45 for another person to chop the right circle, route the Roman numerals, and embody the precise clock mechanism within the value, appeared very affordable to me.
However what I needed wasn’t rustic farmhouse. I needed coloration. So I eliminated the clock palms, sanded the face of the clock with 150-grit sandpaper, and painted it Rust-Oleum Solar Yellow. Then I topcoated it with Rust-Oleum clear gloss spray. I had initially deliberate to color the routed Roman numerals white, however by the point I had it so far, I beloved how delicate the Roman numerals have been, so I made a decision to maintain it this manner. I did paint the clock palms white, although.

And at last, there’s the calendar. In any case however one month fell off of the wall when the 3M sticky squares failed, I went to Dwelling Depot and bought Command Image Hanging Strips. I spent about 90 minutes including 4 image hanging strips to every month, after which rehanging the entire months on the wall. After which they began falling off of the wall AGAIN.
Y’all, I used to be so annoyed. I’ve used Command Image Hanging Strips many instances, and I don’t ever bear in mind them failing. I’ve precise framed photos, with frames, glass, and all, hanging in my home with Command Image Hanging Strips. The frames on the gallery wall contained in the door of our house fitness center are hung with Command Image Hanging Strips. The images on the entryway wall in our home are hung with Command Image Hanging Strips. I’ve used these 100 instances, and none of them have ever failed. And but, they weren’t holding these paper calendars mounted on foam board to the wall. I used to be baffled.
I like image hanging strips as a result of they’re a two-piece system that match collectively like Velcro and can help you take away the image from the wall. However I simply couldn’t get them to stay for some motive. So I ended up going again to Dwelling Depot and buying some T-Rex Tremendous Glue Tape to tape the image hanging strips to the again of the froth board, after which tape the image hanging strips to the wall. And that stuff is SUPER sticky! I don’t see any method that these will fall off of the wall once more. So in the long run, what ought to have been a one-and-done challenge needed to be accomplished 3 times. Speak about irritating!

And since they stored falling off of the wall, a few of them now have dinged corners. You haven’t any concept how exhausting it was for me to place this out of my thoughts and transfer ahead. I needed so badly to order one other calendar and redo the months with dinged corners, however I compelled myself to maneuver on. I’m the one one who will ever be bothered by these corners, and I have to cease obsessing about these tiny issues. (The checkmarks have been to suggest which months had the T-Rex tape. I forgot to return and wipe off these checkmarks.)

In order that’s it! The ornamental a part of this big wall is finished. I’m going to maneuver the TV up a bit if I can (once more, I’ll need to see if the outlet will permit for the TV to be moved up), after which I would like to complete portray the baseboards. However then I’m on to a different challenge in a special a part of the room. Slowly however absolutely, I’m getting the ultimate initiatives checked off of my “to do” record for this room!

Addicted 2 Adorning is the place I share my DIY and adorning journey as I rework and embellish the 1948 fixer higher that my husband, Matt, and I purchased in 2013. Matt has M.S. and is unable to do bodily work, so I do nearly all of the work on the home on my own. You can learn more about me here.
Trending Merchandise


![Rustic Grey Mason Jar Sconces for Home Decor, Decorative Chic Hanging Wall Decor Mason Jars with LED Strip Lights, 6-Hour Timer, Silk Hydrangea, & Iron Hooks for Home & Kitchen Decorations [Set of 2]](https://m.media-amazon.com/images/I/41DPf4UgGOL._SS300_.jpg)
