
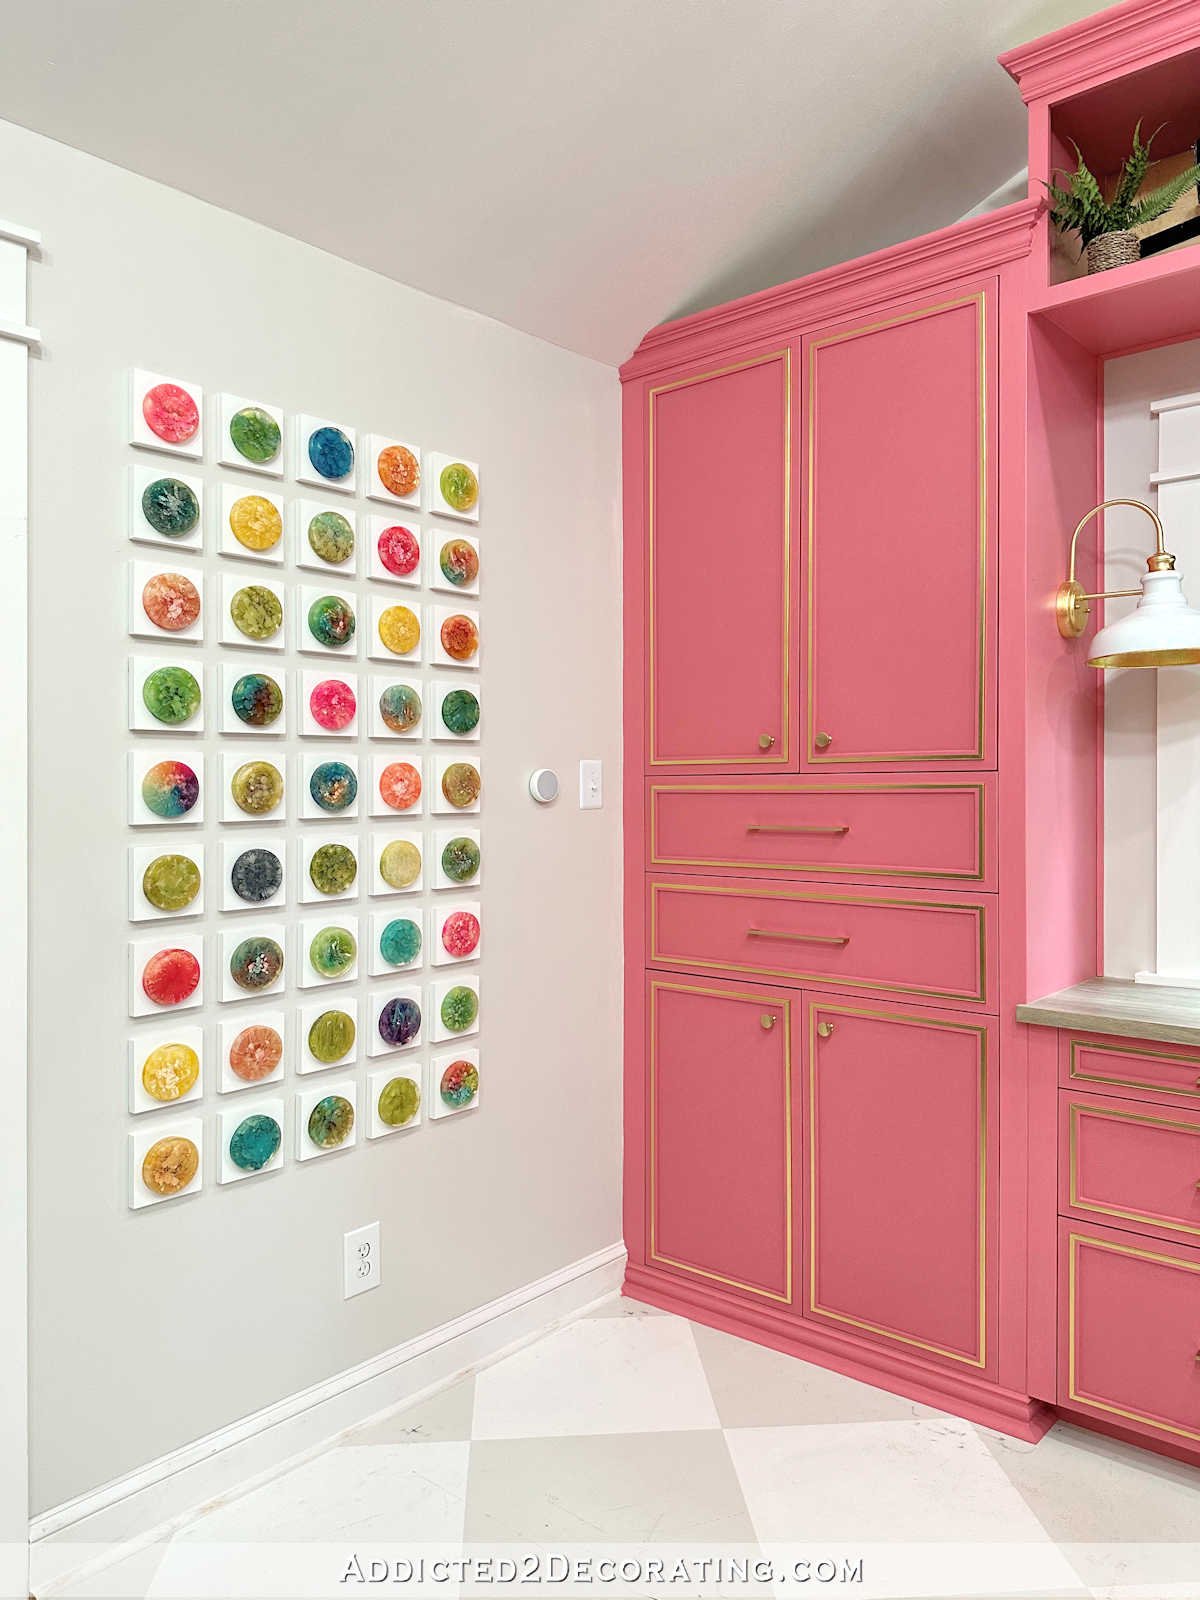
I’ve spent the final two days engaged on a giant show of all of my resin petri discs (fairly circles of clear resin with alcohol inks suspended in them), and I’m so proud of the way it turned out! It’s so brilliant and colourful, and y’all know that I can’t get sufficient coloration. Right here’s the way it turned out…

I made a decision to maintain it tremendous easy. No lights, no coloured backings, no gold accents. Simply white canvases with colourful discs. I just like the simplicity of it. I did strive including gold accents to the edges of the canvases, nevertheless it as simply to busy for my style.
For this venture, I used these 5″ x 5″ wood panels (affiliate hyperlink), and I used to be very impressed with the standard. Out of 5 packs of 10 panels, I solely had one panel that had a bit of ding within the nook. The remainder have been good.
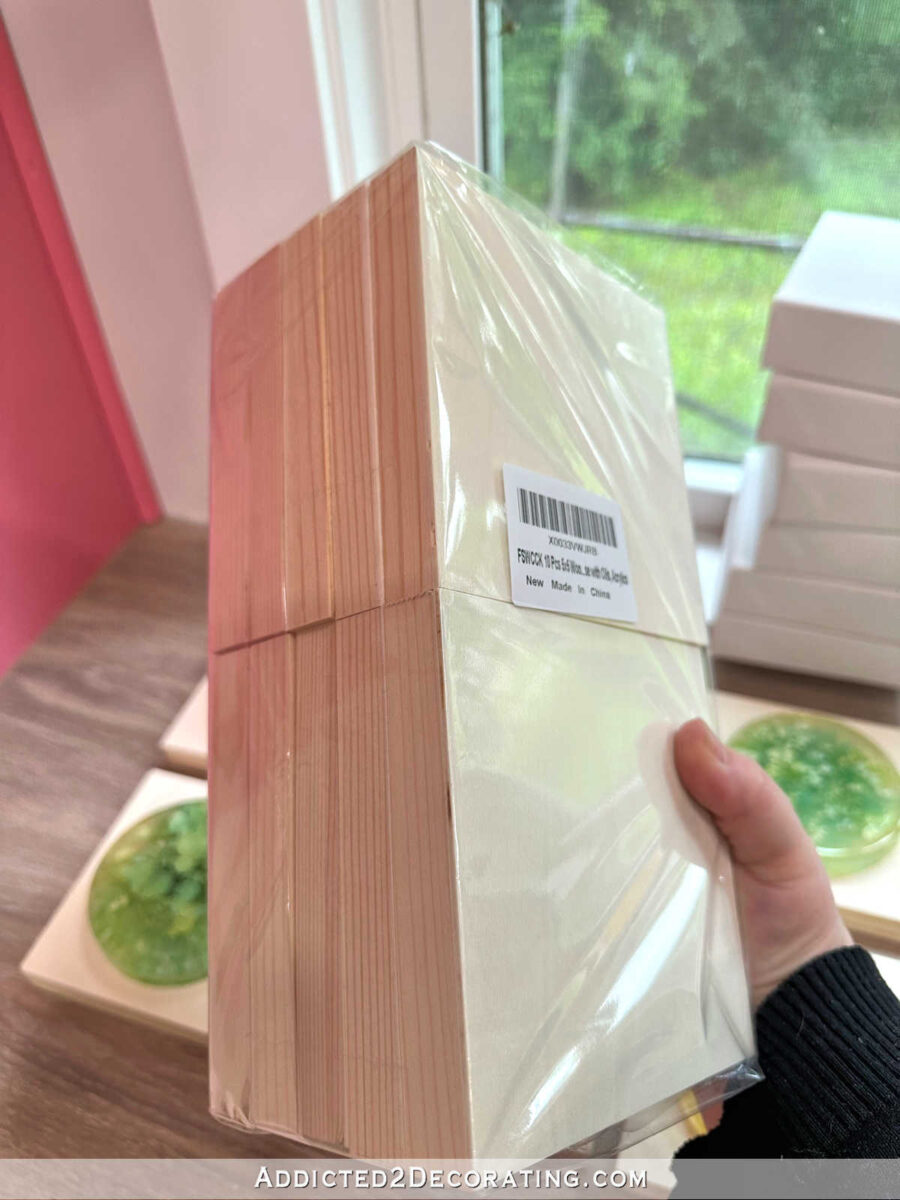
I additionally thought they have been the right thickness at 3/4-inch.

The method as actually quite simple, though I did have 45 of them, so it was fairly time-consuming. I used a bit of 3-inch curler to prime and paint the panels. I used my authentic favourite primer, Zinsser Oil-Primarily based Cowl Stain, after which sanded the panels in a short time with 220-grit sandpaper earlier than rolling on two coats of Behr Polar Bear in a satin end.
After the entire panels have been dry, I used my sizzling glue gun to connect the resin discs to the panels. After which got here the laborious half. I needed to prepare them like I needed them on the wall, in 9 rows of 5. Inexperienced was positively over-represented, so getting the colours all disbursed in a means that I believed appeared balanced took a little bit of time, however that is what I lastly settled on.

After which I used to be lastly able to put them on the wall. I thought-about so many alternative solution to connect these to the wall, however in the long run, I made a decision to make use of sizzling glue. I do know that a few of you can by no means think about utilizing sizzling glue in your wall, and naturally, there are many different choices. This selection appealed to me as a result of as soon as it’s on the wall, they’d keep put. They wouldn’t be knocked out of line as I stroll by and brush up towards them. They received’t shift if I come within the again door and slam the door a bit of too laborious. I simply couldn’t have a show of 45 squares that always wanted to be adjusted.
I’d usually use 3M image hanging strips for one thing like this, however I had two points with that choice. First, shopping for sufficient for 45 panels would have been costly. And in addition, these image hanging strips are thick, so the panels would have stood away from the wall only a bit, and the strips would have proven.
So with all of that in thoughts, I opted for decent glue. Beginning with the center row, I discovered the middle of the show space, and I began with the middle panel. After which I used my stage to get the middle row stage, and I used a scrap piece of 1″ x 2″ lumber for the spacing. And utilizing these instruments, plus the recent glue gun, I labored out from the middle panel.

I went into way more element about find out how to hold a giant gallery wall (which is mainly what that is) after I put in the butterfly gallery wall within the water closet of our lavatory. Should you’d like extra element in regards to the course of, you possibly can see that right here: Grid Gallery Wall Using 25 Free Butterfly Illustration.
One necessary factor to remember when doing a gallery wall with this many objects is that irrespective of how laborious you strive, and irrespective of how a lot of a perfectionist you might be, it is going to by no means be good. As a perfectionist, I hate to confess that, nevertheless it’s true. You simply need to make slight changes as you go, and know that when the wall is considered as a complete, these slight imperfections most likely received’t stand out in any respect.

It took fairly some time to get all 45 panels on the wall, particularly as a result of I began to second guess myself about midway by means of. I began to query the place of the association that I had chosen, and puzzled if it will look higher centered between the cupboard on the appropriate and the casing on the left moderately than what I had accomplished, which is to middle the show between the thermostat on the appropriate and the casing on the left.
So at in regards to the midway mark, I took the panels on the primary column off of the wall (which was surprisingly straightforward to do with a rubber mallet, and it didn’t injury the wall), and moved these to the appropriate facet as a substitute. That made the entire association virtually lifeless middle on the wall. And I hated it. That made one of many panels proper up towards the thermostat — the spherical thermostat — which three every part off visually because it made it appear like the thermostat was attempting to be part of the entire association, however had fallen out of line. My mind couldn’t deal with that. 😀 So I eliminated that row once more, and moved them again to the left facet.
I’m superb with this association and the location as a result of the cupboard doorways can open utterly with out hitting any of them.

And that’s it! Right here’s how the ultimate wall association seems to be as of this morning with the instruments put away (or shoved out of view 😀 ). And also you’ll discover that I nonetheless need to caulk and paint the baseboards. This wall association venture took longer than I anticipated, so I didn’t get make any progress on any of the trim this weekend.
However who even cares about trim once we can have a look at all of this superb coloration?

I simply can’t even get sufficient of it. And my absolute favourite factor about it’s that it’s seen from the kitchen sink. So I can stand at my sink and wash dishes and see all of this magnificent coloration.

In fact, the view from the kitchen is extra like this facet view, however I like the facet view additionally.

In fact, you’ll by no means get the total affect of the wall in footage. Sadly.

The great thing about these resin and alcohol ink petri discs is the 3D impact the place you possibly can see the “motion” of the alcohol ink suspended contained in the resin. And that’s laborious to seize in photographs.

I’m so happy with how this turned out!

And subsequent up, I’m going to mount and hold the massive panorama design plan. Y’all, that factor is 52 inches vast and 78 inches tall! It’s HUGE and superb, and I can’t wait to see it on the wall. So keep tuned for that.

Addicted 2 Adorning is the place I share my DIY and adorning journey as I rework and beautify the 1948 fixer higher that my husband, Matt, and I purchased in 2013. Matt has M.S. and is unable to do bodily work, so I do nearly all of the work on the home on my own. You can learn more about me here.
Trending Merchandise


![Rustic Grey Mason Jar Sconces for Home Decor, Decorative Chic Hanging Wall Decor Mason Jars with LED Strip Lights, 6-Hour Timer, Silk Hydrangea, & Iron Hooks for Home & Kitchen Decorations [Set of 2]](https://m.media-amazon.com/images/I/41DPf4UgGOL._SS300_.jpg)
