
The cupboards within the workplace space of my studio took me so lengthy to complete, and coated so many weblog posts, that I assumed it might be useful to condense the entire data into one submit with hyperlinks to the precise posts that you’ll discover useful if you wish to customise IKEA Sektion cupboards in an analogous means. So let’s begin on the very starting.
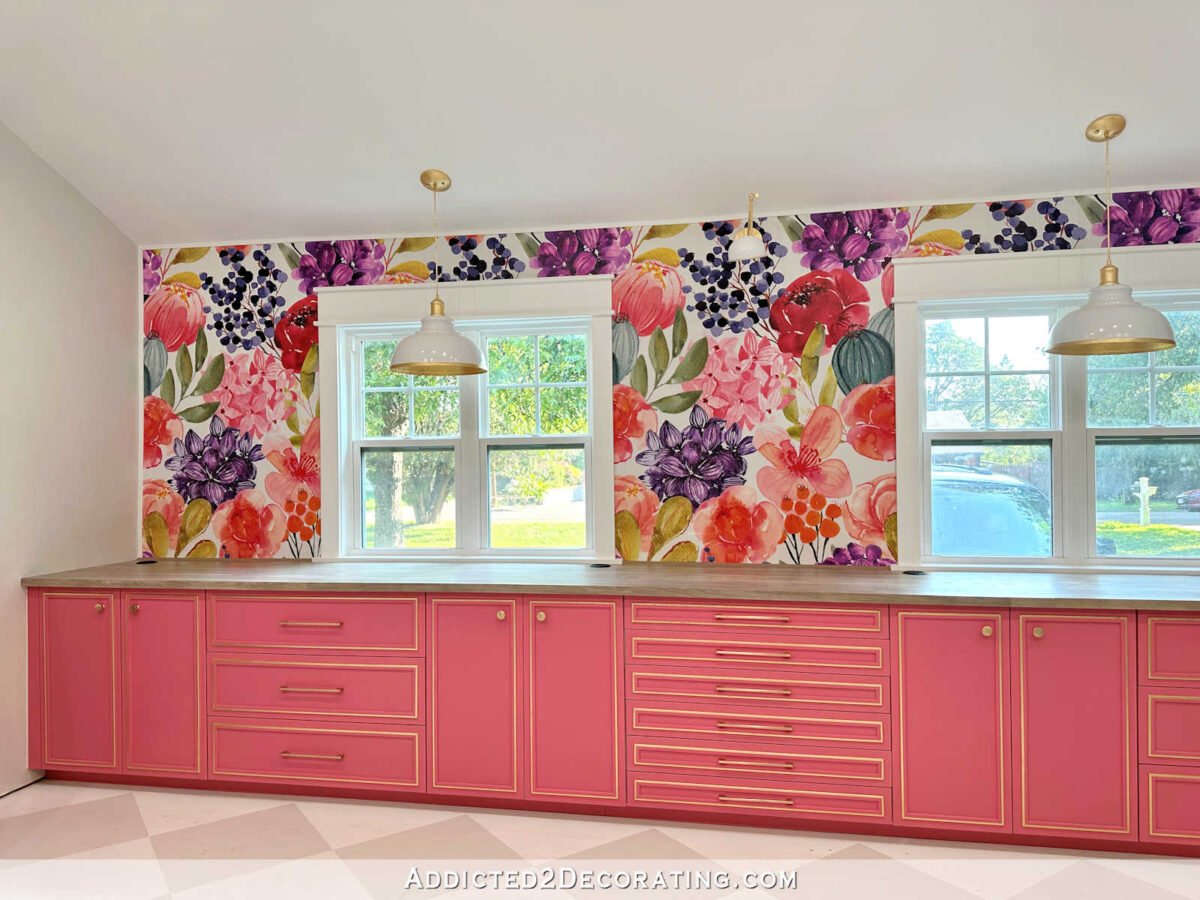
These cupboards, that are additionally IKEA Sektion cupboards, turned out like this…
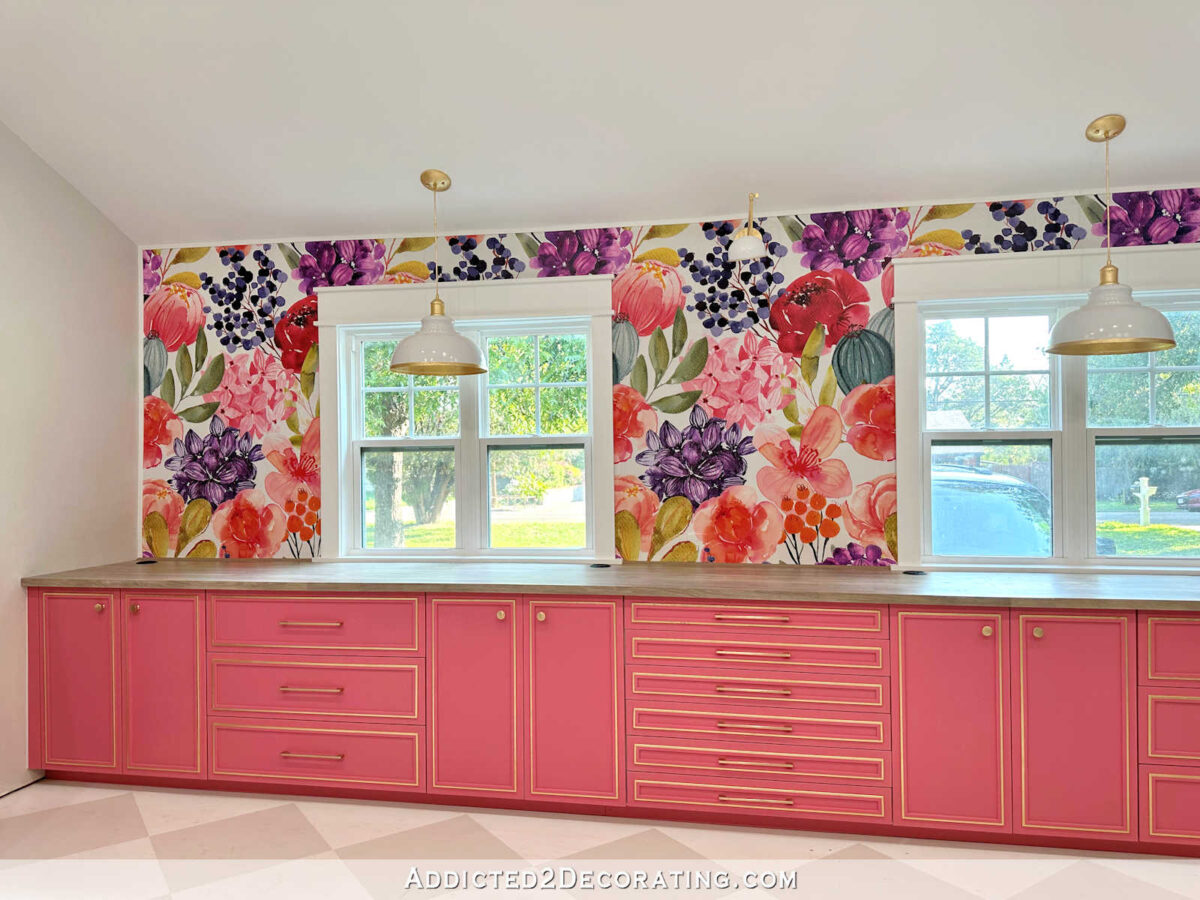
So whereas a lot of the method was the identical for the workplace space cupboards, there have been additionally loads of further steps required to get the workplace space cupboards to appear like this…

So I’ll begin initially and undergo the method for these cupboards.
Prepping the cupboard bins
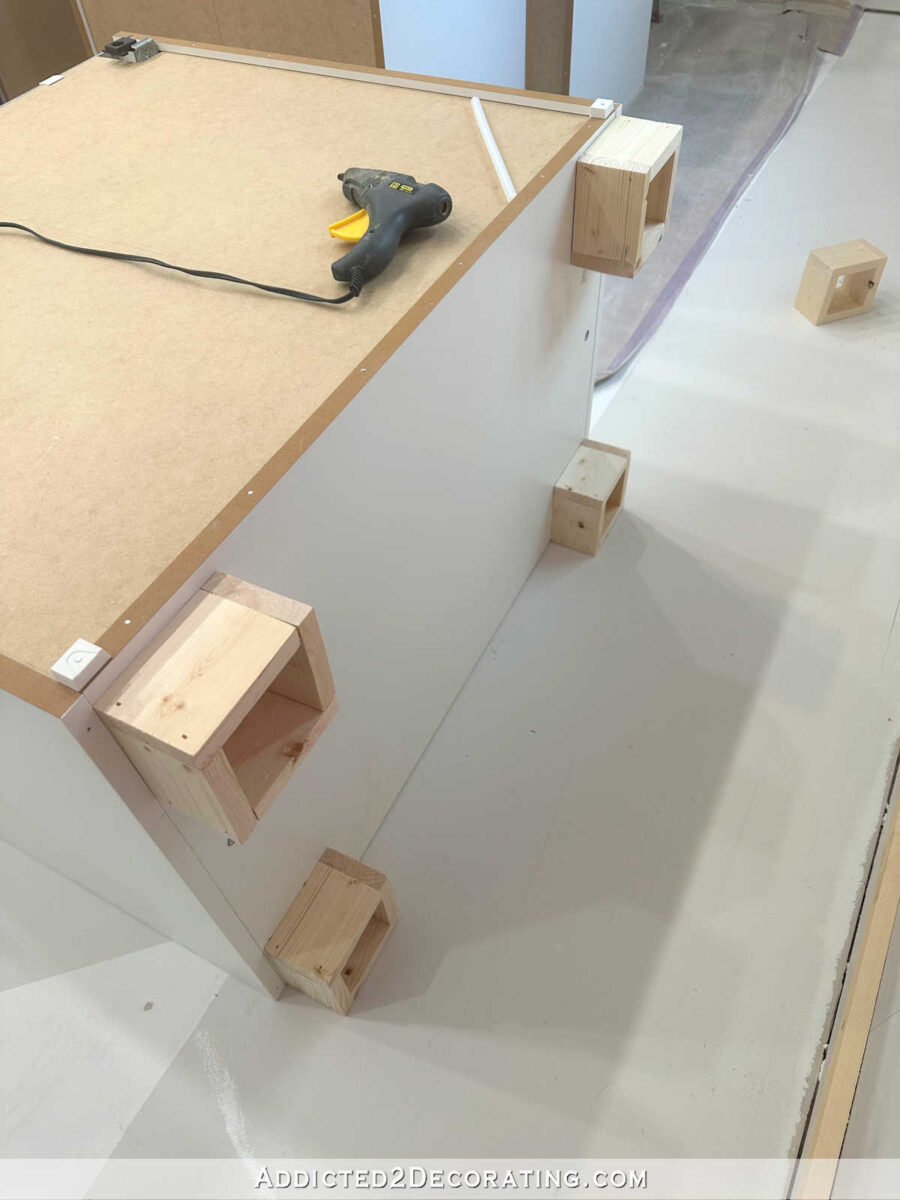
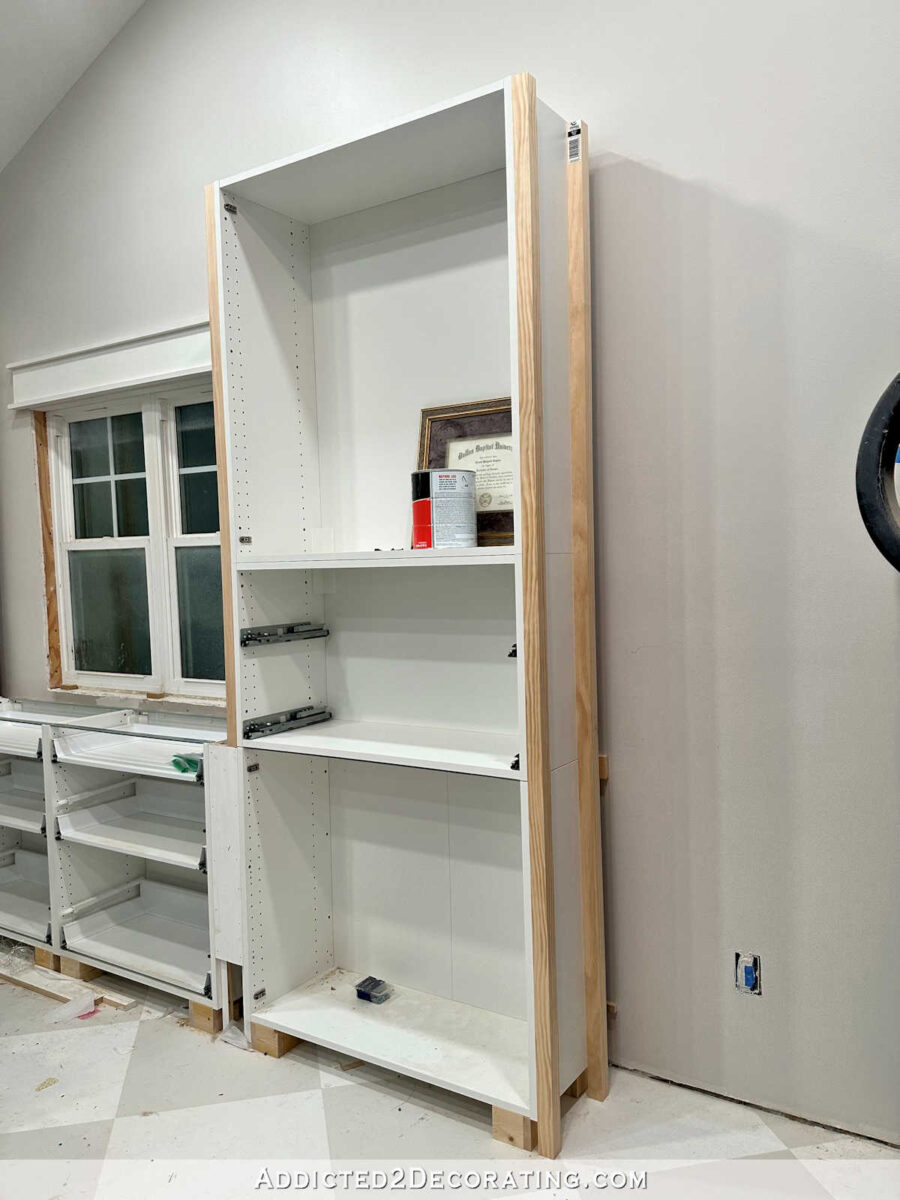
After placing the cupboard bins collectively in keeping with the directions supplied with the IKEA Sektion cupboards, I made and connected my very own toes slightly than utilizing the toes which you can buy individually from IKEA for the Sektion cupboards. The rationale I did it’s because I wanted a really particular peak that was shorter than the shortest doable peak that the IKEA adjustable legs present. So I simply used 1″ x 4″ lumber, lower all the way down to the correct width on my desk noticed, after which lower, glued and nailed 4 items collectively for every foot that I wanted. They didn’t must be fairly since they wouldn’t present on the completed cupboards.
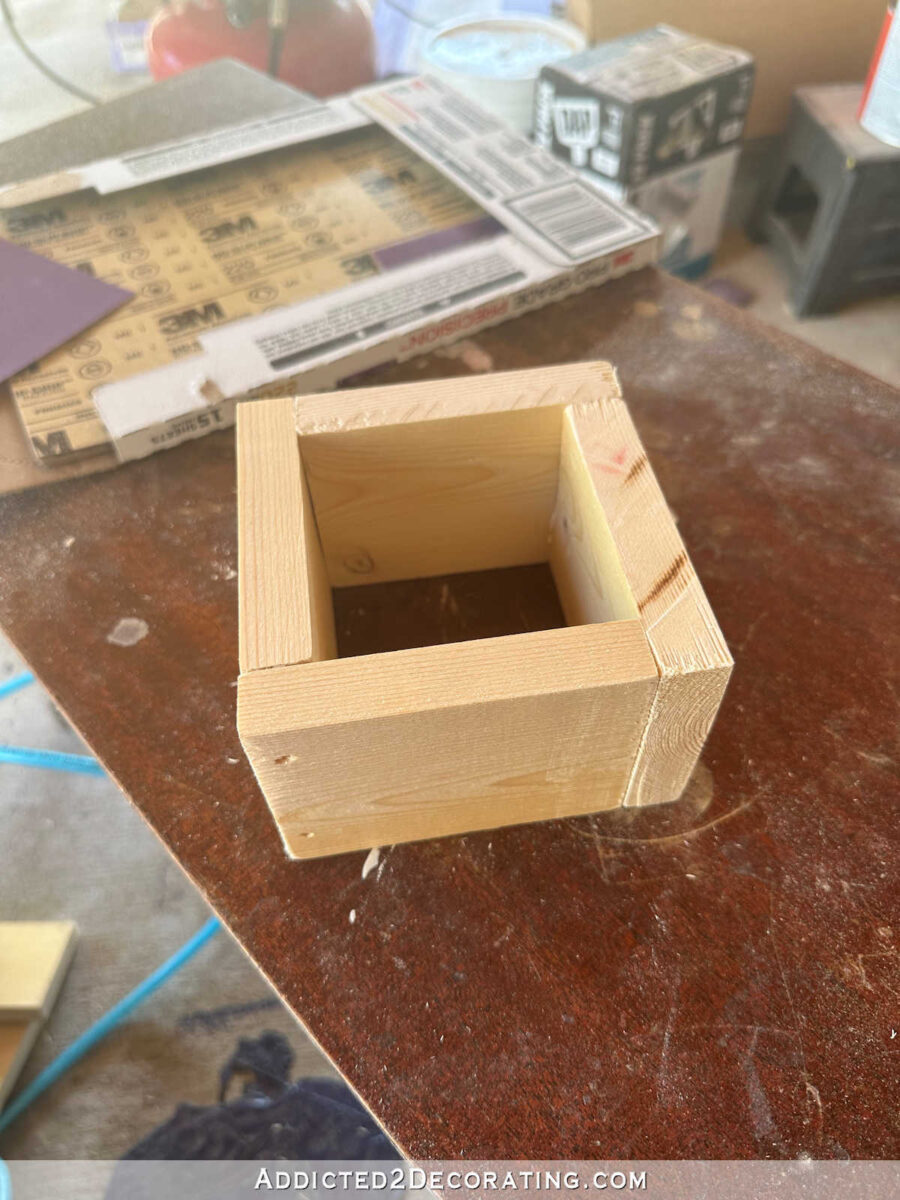
After which I connected these to the bottoms of the decrease cupboards utilizing a scorching glue gun.
Putting in the IKEA Sektion cupboards
I additionally didn’t use the rails that IKEA sells for securing the cupboards to the wall. As an alternative, I used 1″ x 4″ lumber, connected to the wall by screwing it into the studs, after which I used the {hardware} offered (screws and brackets) with the cupboards to screw the cupboards to the 1″ x 4″ board, and in addition to screw the cupboards to one another.
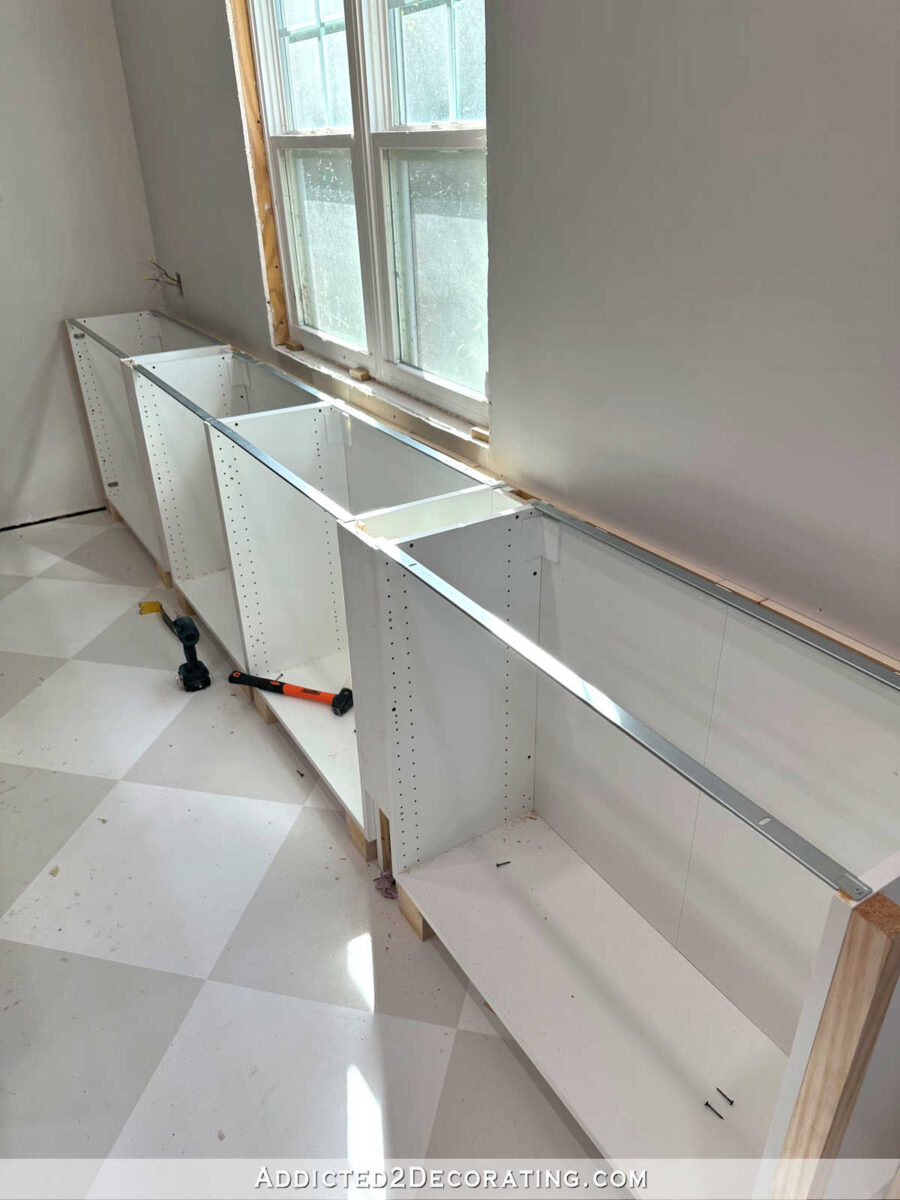
And right here’s the place this cupboard set up grew to become very totally different from the mural wall cupboard set up. As soon as the decrease cupboards had been secured to the wall and to one another, I added the facet higher cupboard bins, screwing the bins collectively as I went alongside.
With the entire bins assembled and secured to the wall and one another, that is what it seemed like…
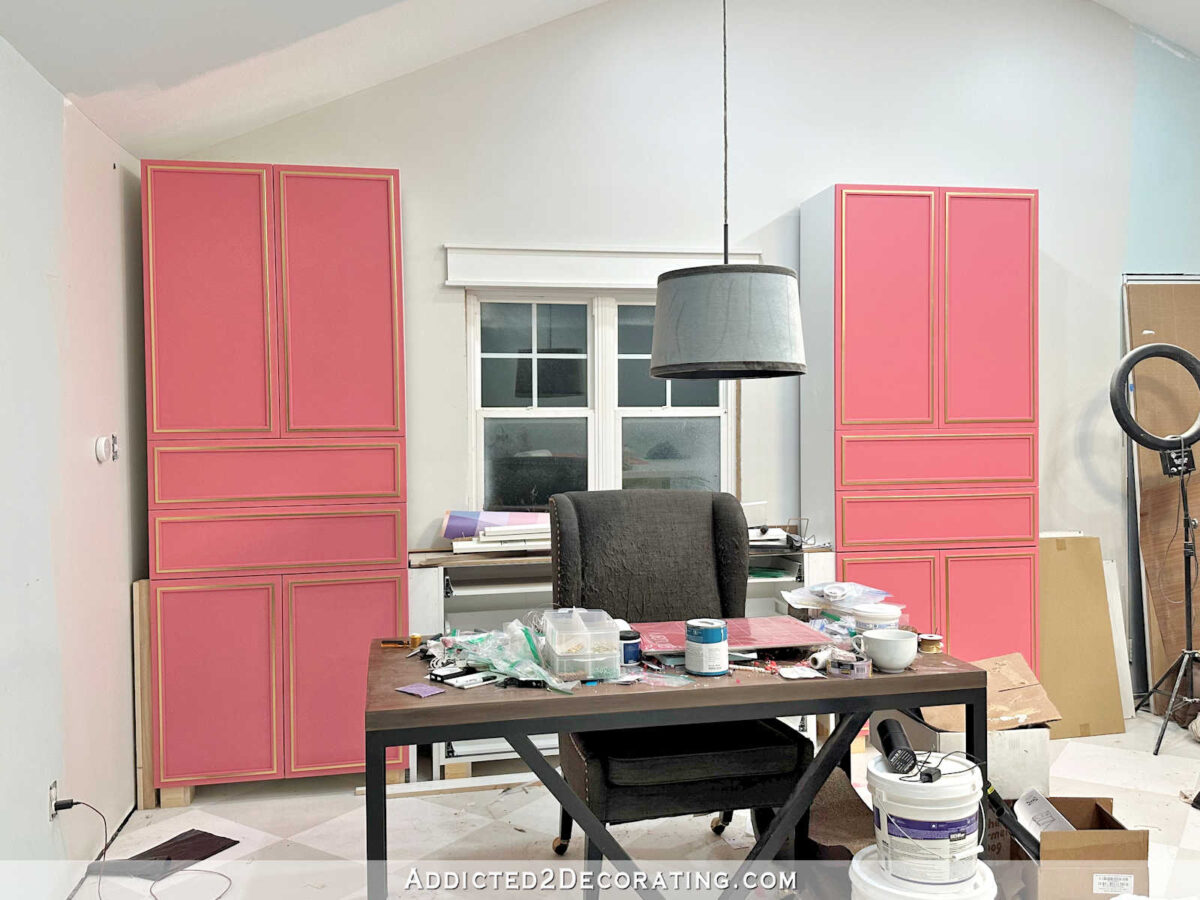
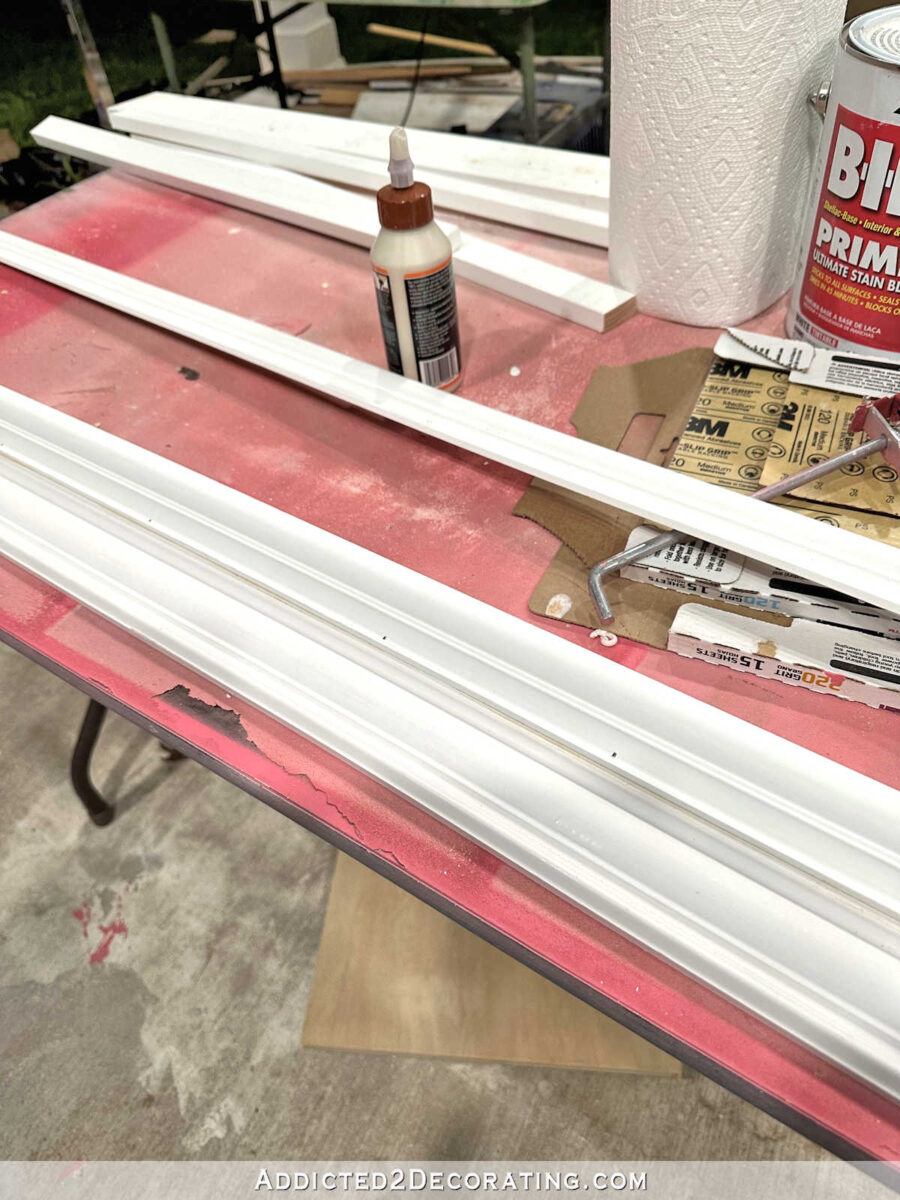
Customizing and portray IKEA Veddinge doorways and drawer fronts
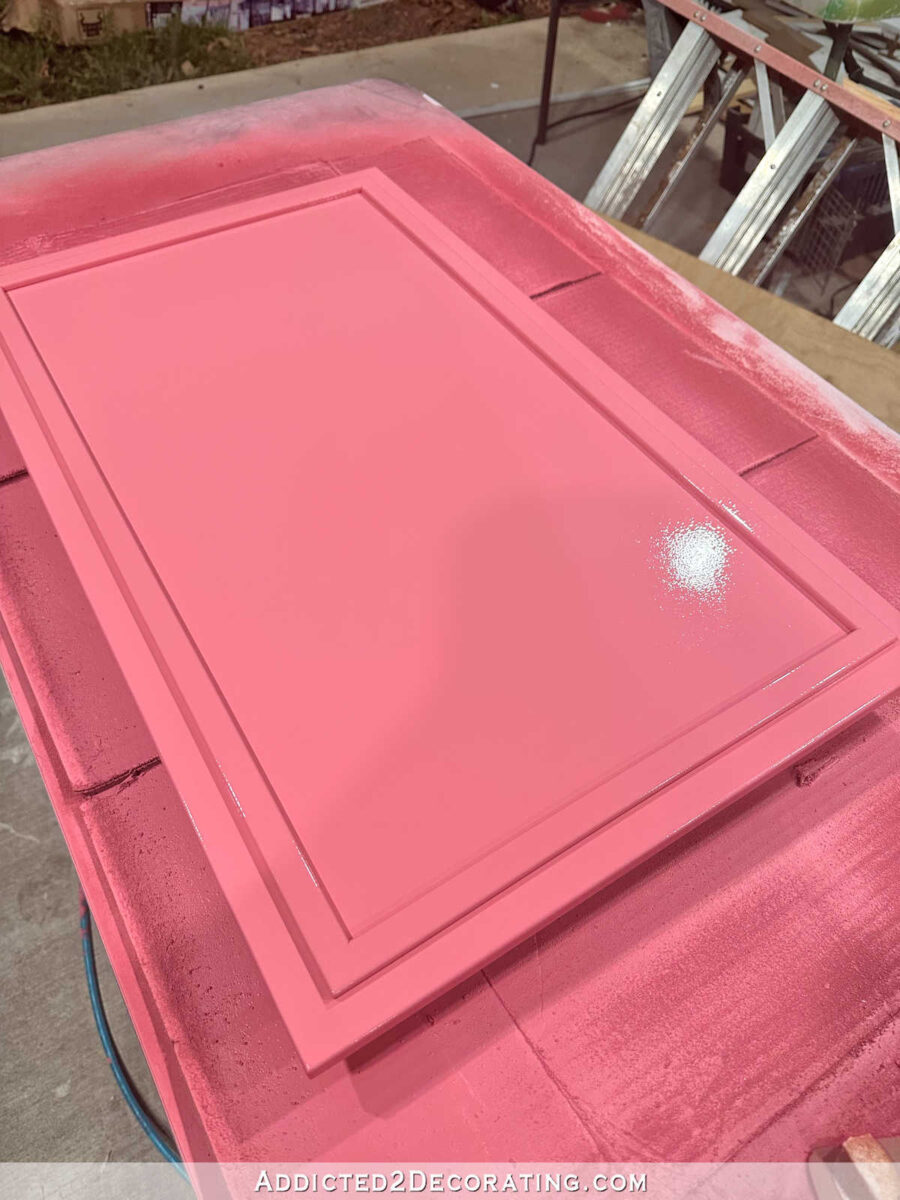
I used Veddinge doorways and drawer fronts as a result of they’re flat and fabricated from MDF, so I assumed they might be the best to customise. I sanded every one on the back and front…

After which added trim to customise the look…
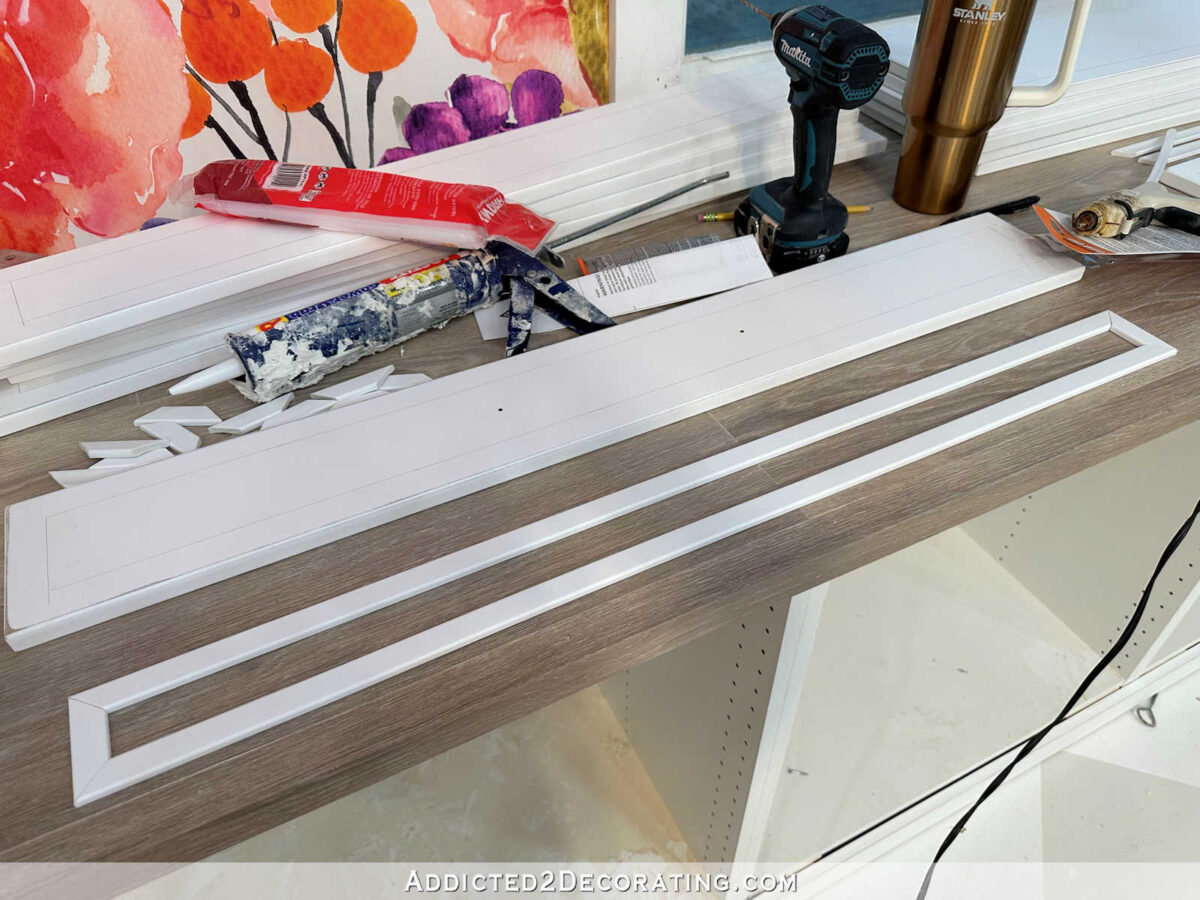
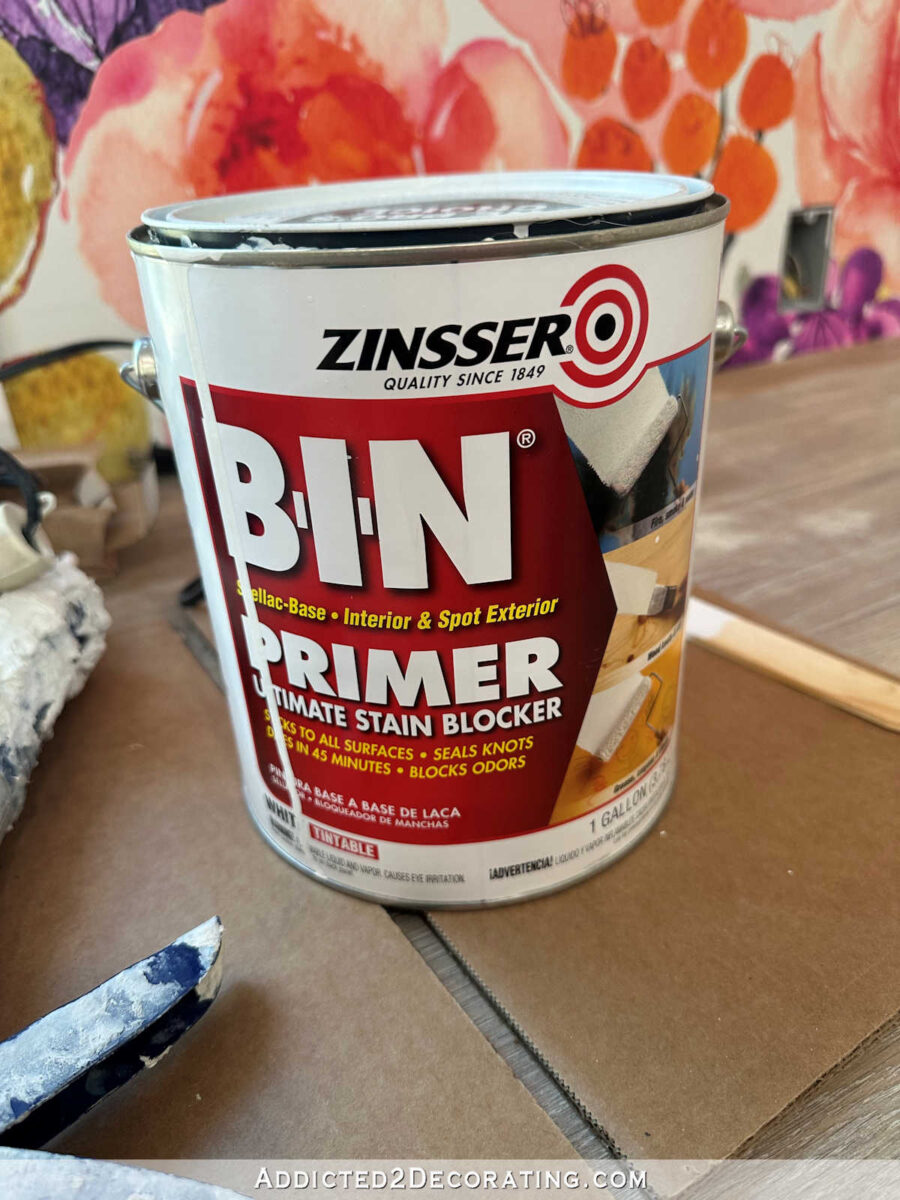
After the trim was connected and caulked, I used BIN shellac-based primer to prime the doorways and drawer fronts utilizing my sprayer.
I sanded by hand with 220-grit sandpaper between every coat to make sure the most effective end doable.
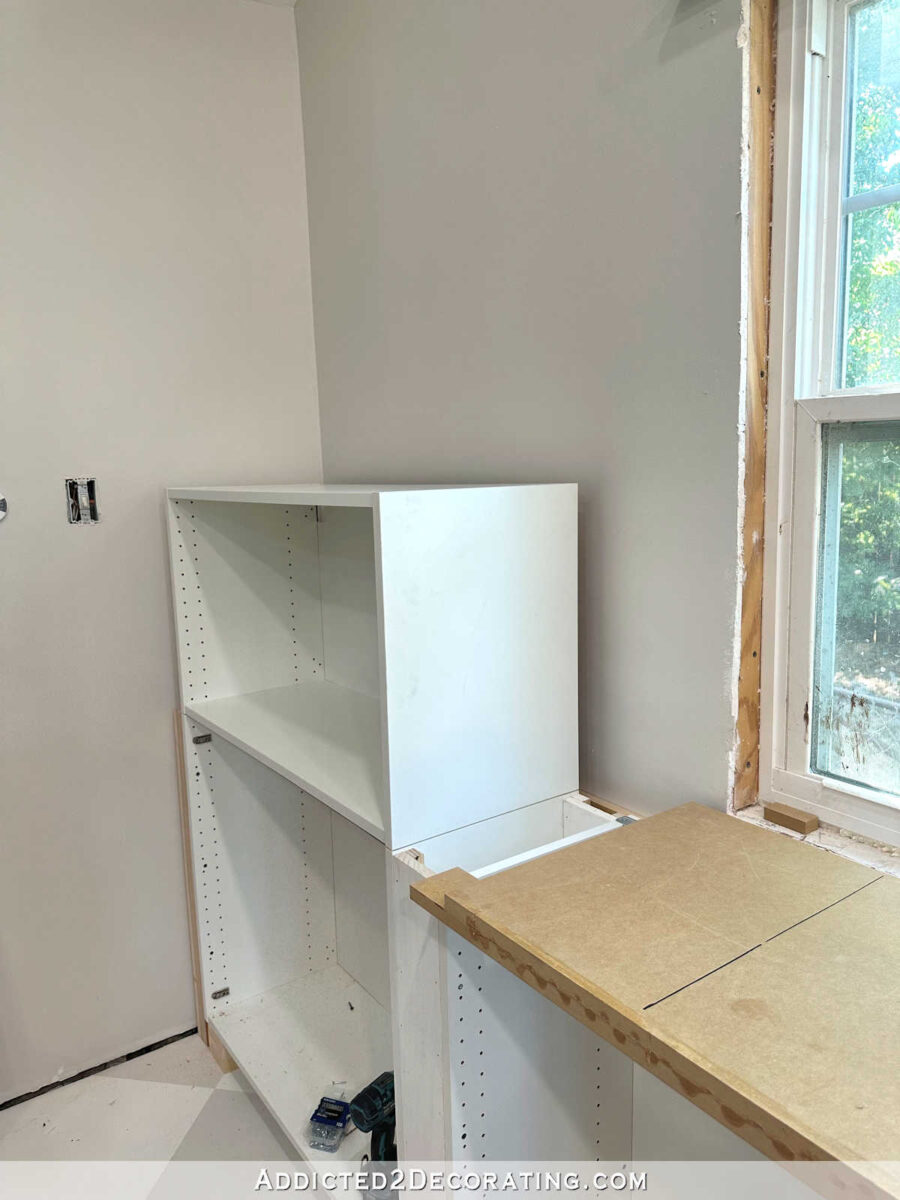
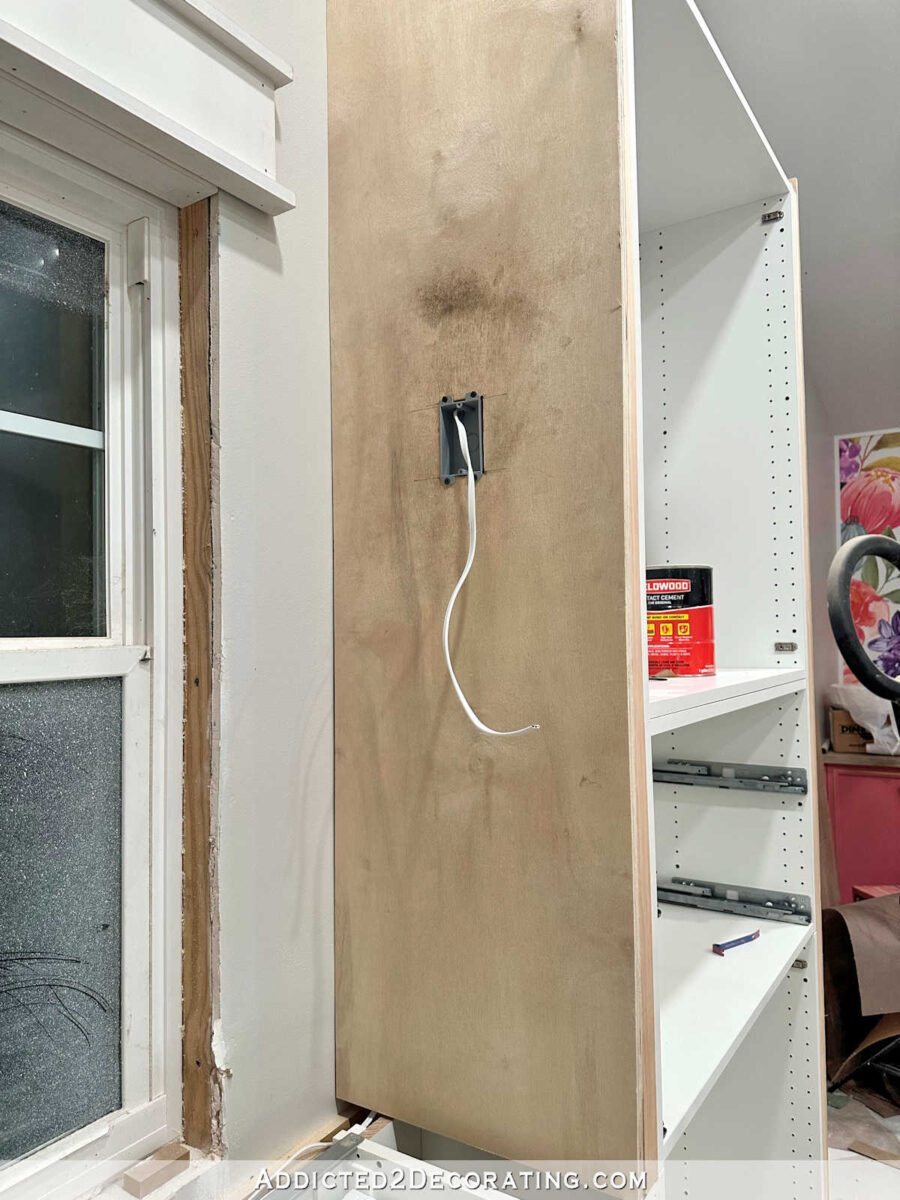
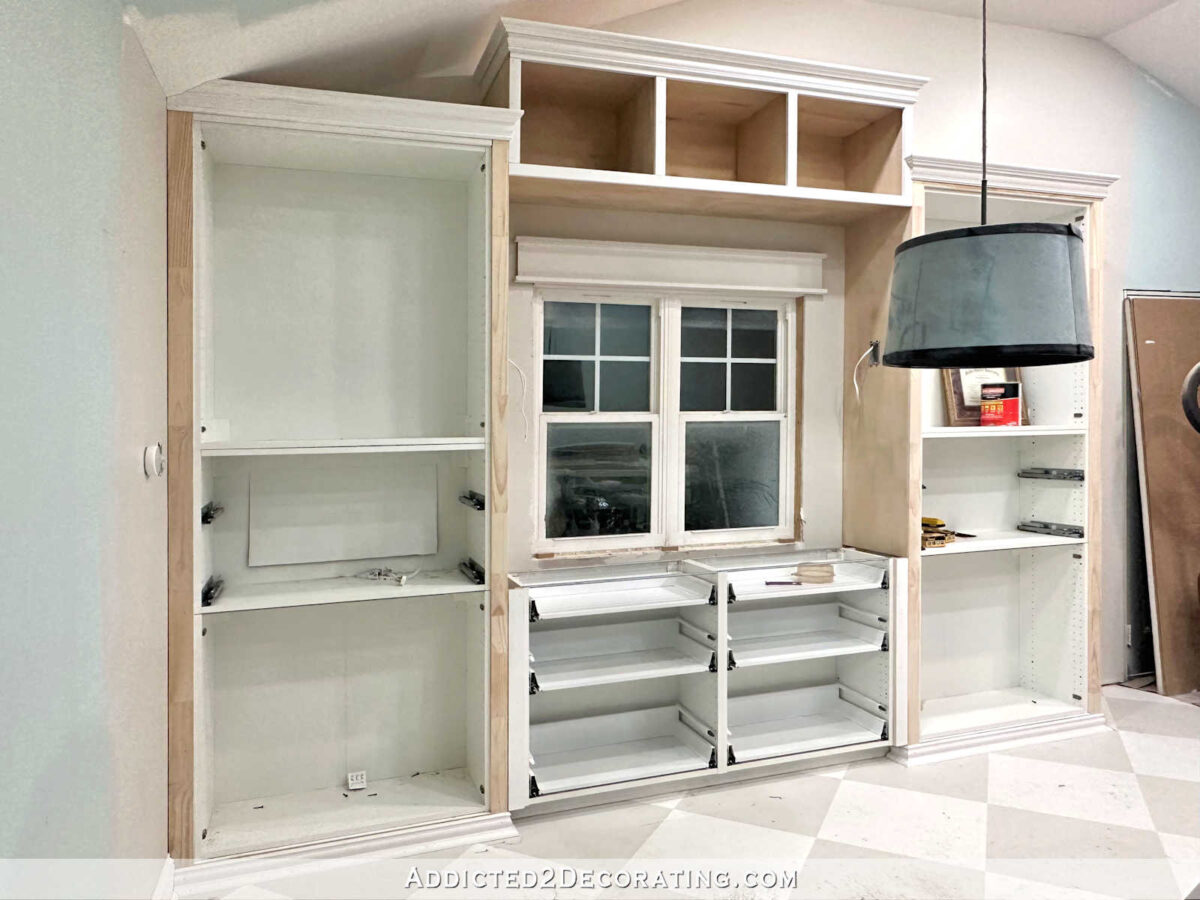
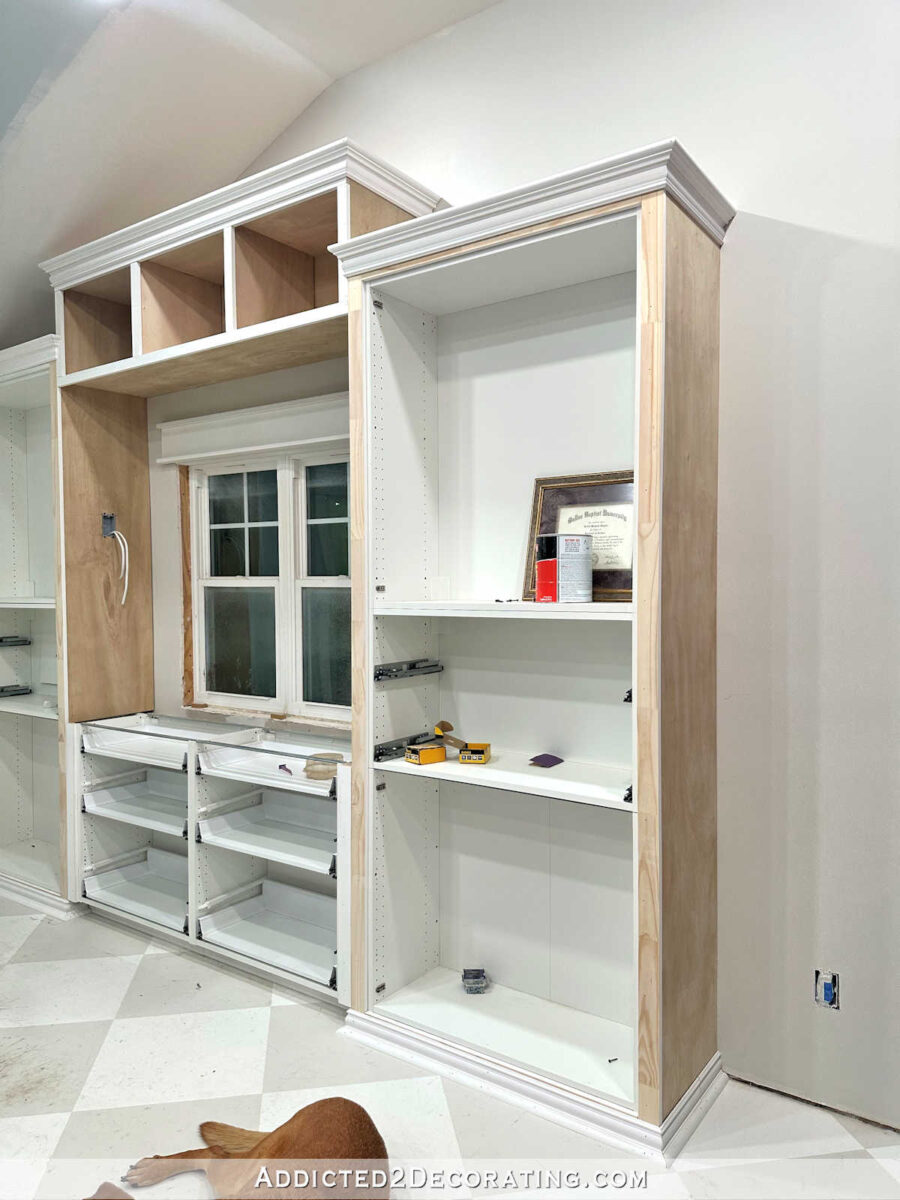
Constructing out the cupboards and wiring for sconces
I didn’t need these cupboards to have the look of full overlay doorways and drawer fronts after they had been completed. I wished them to have extra of an inset look after they had been completed. In order that required fairly a bit of labor with the addition of numerous spacers, plywood facet panels, and plenty of planning to get them good.
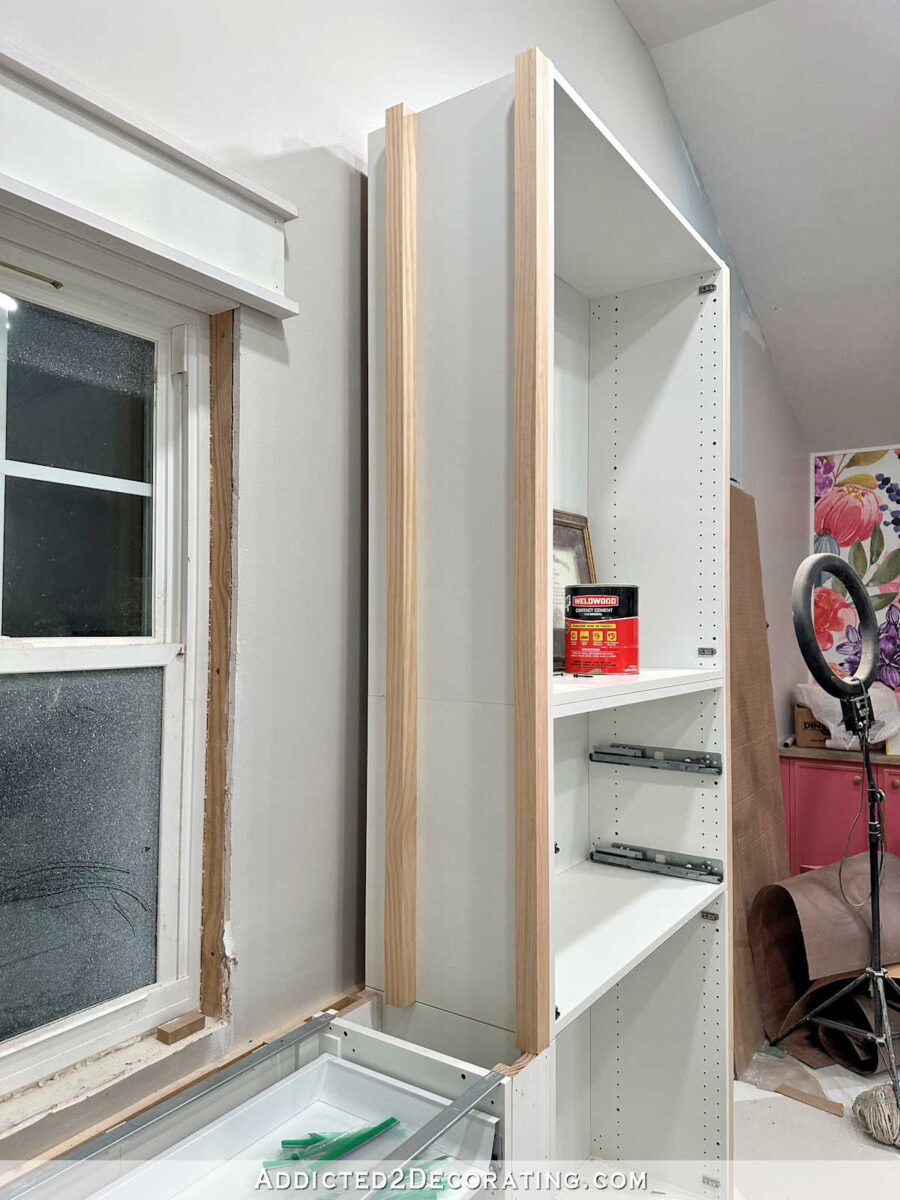
The essential thought is that I wanted to not solely construct out the edges of the cupboards, but in addition present space for entrance trim to be connected to, in addition to add house for electrical wires to journey by means of.
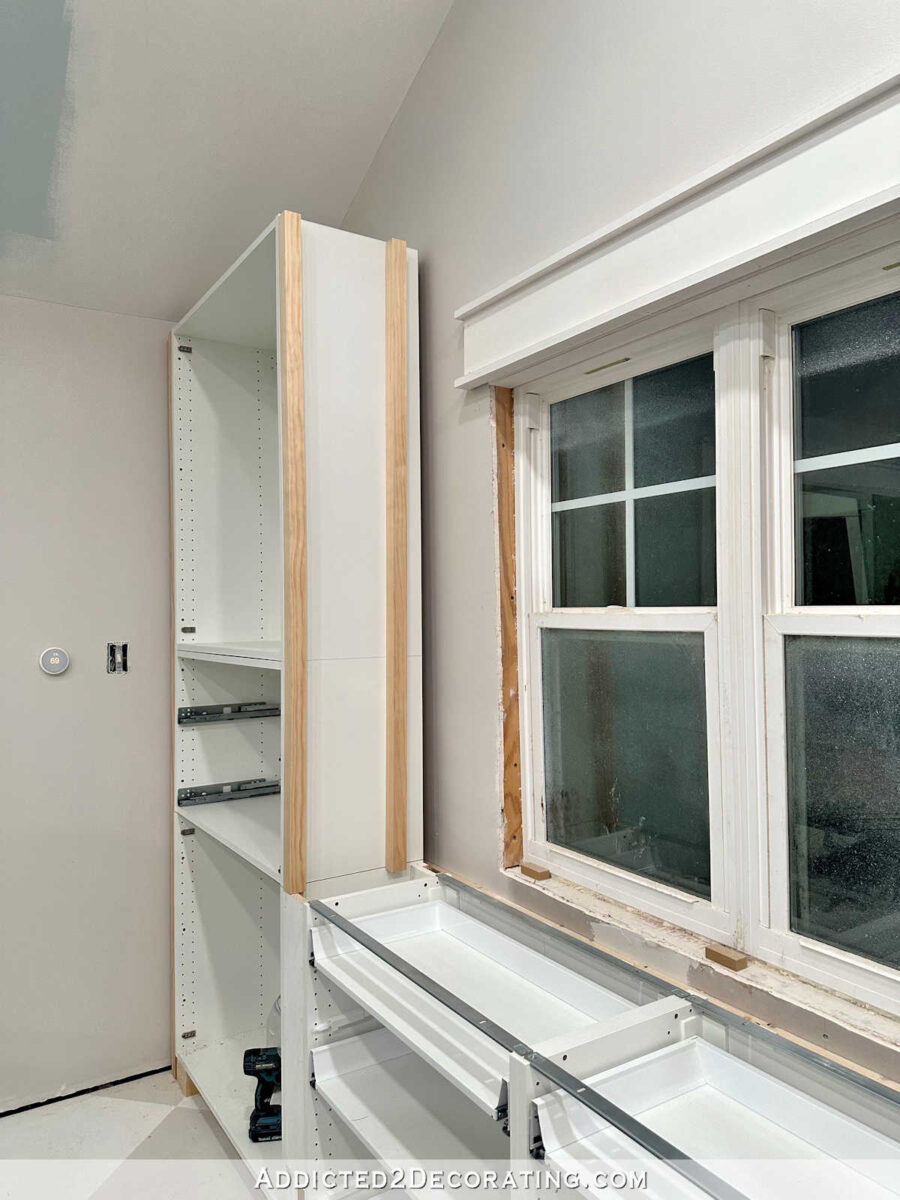
And I did that by including two 2″ x 2″ items of lumber to every facet of every cupboard…
After which attaching plywood to these 2″ x 2″ strips. (I used plywood as a substitute of the IKEA facet panels since I used to be going to be priming and portray.)
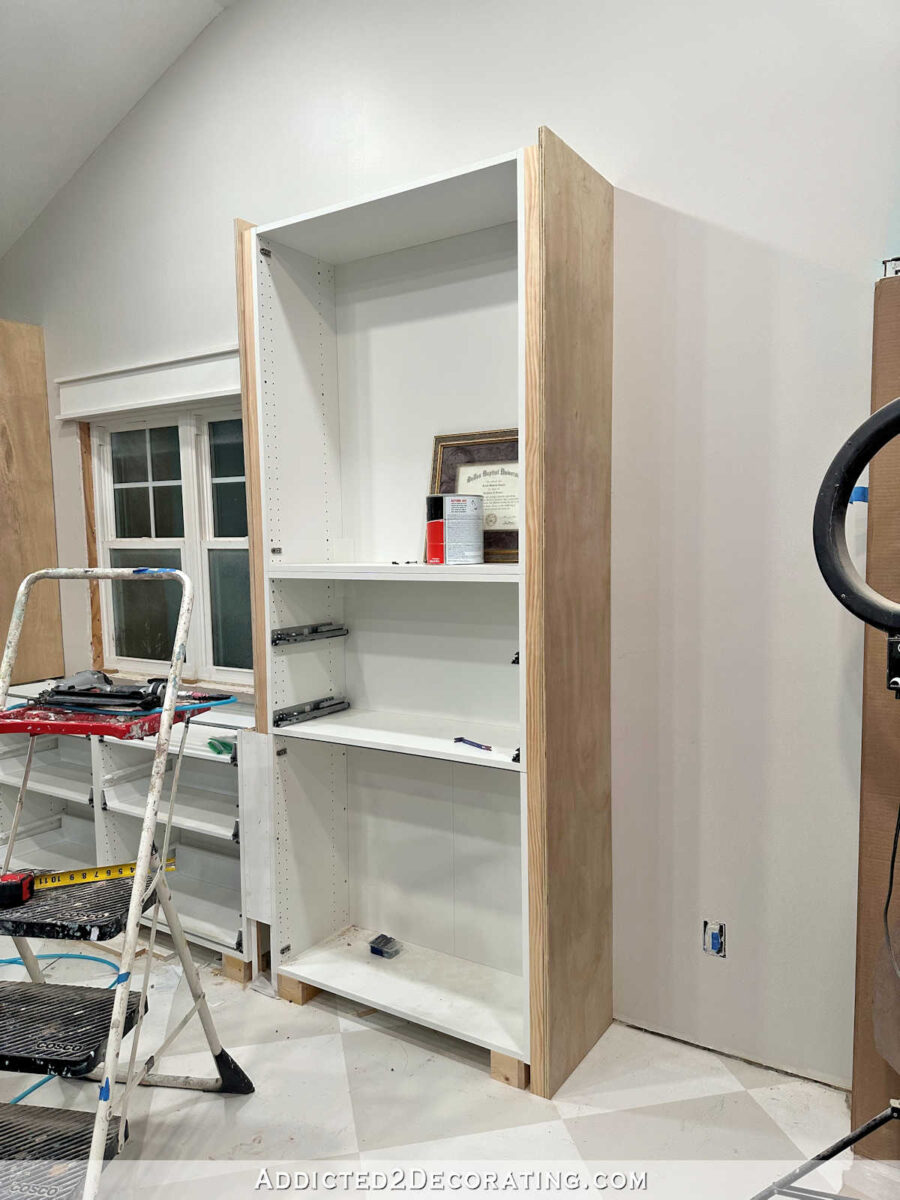
That allowed me so as to add trim to the entrance edges (turning the doorways and drawer fronts from full overlay to inset), and it additionally allowed me to run wiring so as to add sconces.
However once more, each step of that course of is detailed within the submit linked above.
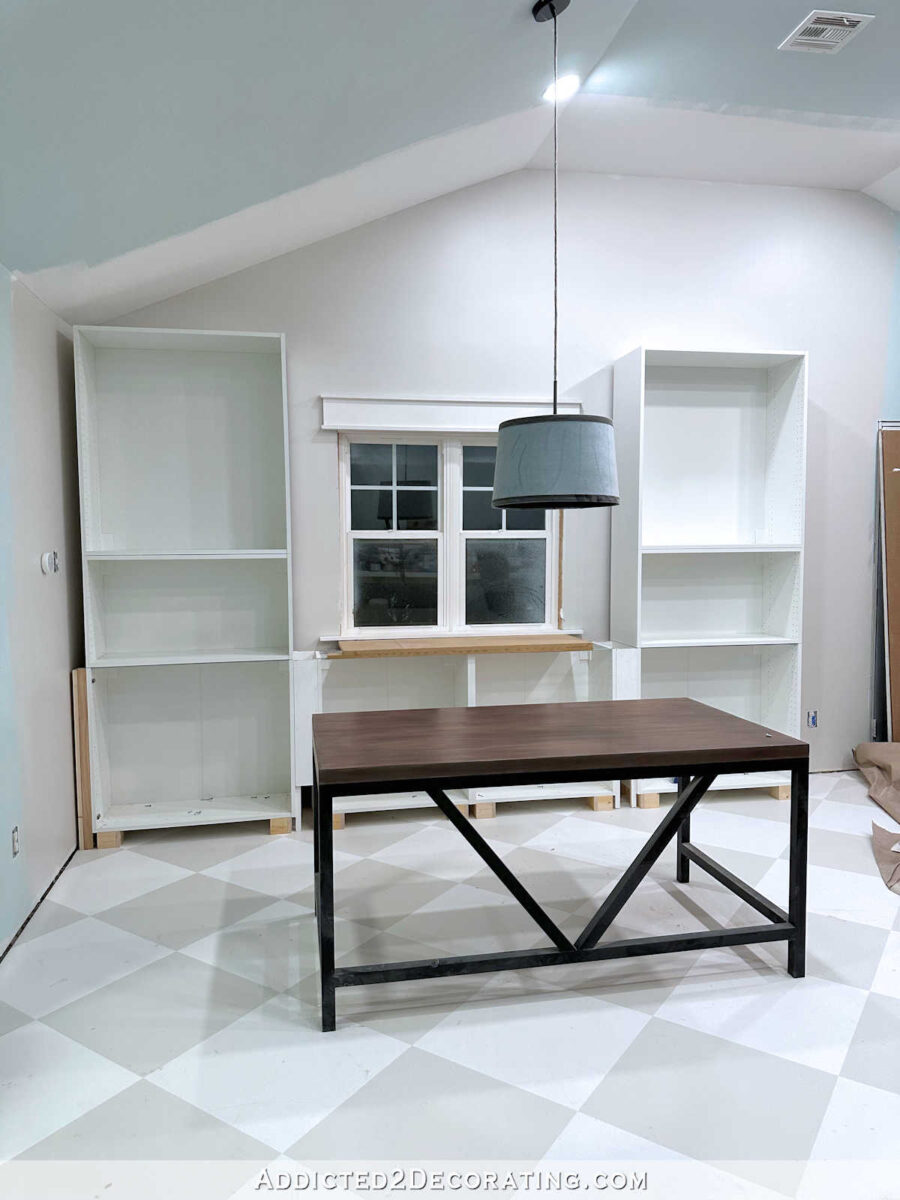
Constructing the bridge
I made a decision to construct a bridge connecting the 2 facet cupboards primarily as a result of with out the bridge, the cupboards appeared to be a bit dwarfed by this very giant and tall wall. You’ll be able to see what I imply on this picture.
I felt like including a bridge would make the cupboards look rather more substantial on that massive wall, in addition to giving the cupboards a extra customized look.

Trimming out the cupboards
As soon as the entire primary construct was completed, I used to be lastly able to trim out the cupboards. Including the ornamental trim is all the time enjoyable as a result of it actually provides the cupboards a completed and customised look.
I additionally shared a “cheat” methodology for creating the look of considerable crown molding with out the effort of getting to truly lower crown molding.
Right here’s what the fake crown molding seemed like as soon as it was put in.

And right here’s how the cupboards seemed as soon as they had been all trimmed out…
And after that, it was only a matter of priming, portray, and clear coating the cupboards earlier than I may set up the doorways and drawer fronts.

Constructing the countertop
I made the countertop on this part of cupboards in the very same means I made the lengthy 20-foot countertop on the mural wall part of cupboards.

The primary distinction between that lengthy 20-foot countertop and this smaller one was that this smaller countertop required returns on the ends for the reason that countertop sat between cupboards, with the the countertop projecting about an inch previous the entrance of the cupboards, as a substitute of sitting between two facet partitions.

The ending particulars
And with a number of extra particulars, like putting in the window trim, putting in the sconces, and gold leafing the backs of the cubbies, and including the drawer and door pulls, the cupboards had been completed!

Addicted 2 Adorning is the place I share my DIY and adorning journey as I rework and enhance the 1948 fixer higher that my husband, Matt, and I purchased in 2013. Matt has M.S. and is unable to do bodily work, so I do the vast majority of the work on the home on my own. You can learn more about me here.
Trending Merchandise


![Rustic Grey Mason Jar Sconces for Home Decor, Decorative Chic Hanging Wall Decor Mason Jars with LED Strip Lights, 6-Hour Timer, Silk Hydrangea, & Iron Hooks for Home & Kitchen Decorations [Set of 2]](https://m.media-amazon.com/images/I/41DPf4UgGOL._SS300_.jpg)
