

I did it! I constructed the cubby bridge on my studio workplace space cupboards all on my own yesterday, and I couldn’t be extra thrilled with how this part is popping out! As a reminder, right here is the aim…

And initially of the day yesterday, that is how the cupboards in that space of the room regarded…

The precise cupboards (the white elements) are IKEA Sektion cupboards, and I’m within the means of customizing them. This has been a multi-post venture simply getting them up to now, so I’ll hyperlink the earlier posts on the backside of this one.
When it got here to constructing the cubby bridge, my preliminary thought was the construct it within the carport, after which deliver it inside and screw it to the perimeters of the cupboards. However I work alone. For many who are new round right here, my husband Matt has M.S. and is fully unable to assist me with tasks. And whereas there are a number of individuals who can be keen to come back and assist me, I actually hate to hassle folks for issues like this. Plus, I’m fiercely impartial, and I thrive on determining learn how to do issues myself.
In order that was the problem. How do I construct a cubby bridge, after which hoist the factor up there on my own whereas making an attempt to screw it into place? The reply? I DON’T! As an alternative, I made a decision to construct it in place. That appeared like essentially the most “work smarter, not tougher” resolution to me. Right here’s how I did it…
First, I measured and marked the place I wished the bridge to be hooked up to the aspect cupboards, and I hooked up a chunk of scrap wooden to the aspect of the cupboard with the highest fringe of the board alongside the road I simply marked. This ledger board is non permanent, and I hooked up it utilizing three 1.5-inch 16-gauge nails.

After which I repeated that course of on the opposite aspect.

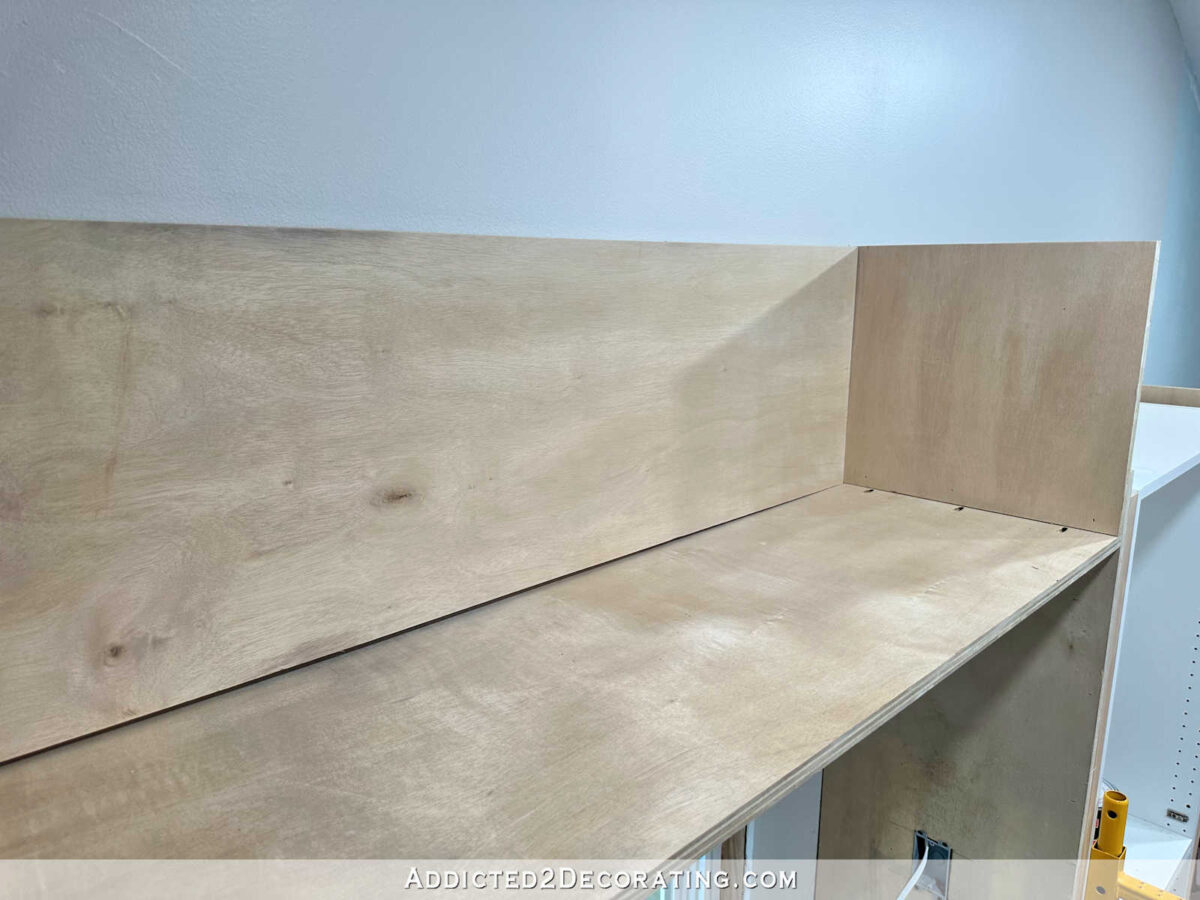
With my non permanent ledger boards in place, I measured and lower a chunk of three/4-inch plywood for the underside of the cubby bridge. It took a few tries to get the match excellent, however on the second attempt, it match completely between the aspect cupboards and rested on the ledger boards. You may see that it bows down somewhat bit within the center, however I wasn’t fearful about that. That will probably be corrected later within the buiding course of.

After becoming that piece, I eliminated it and drilled three pocket holes on every finish. These pocket holes are on the highest of the board, not the underside. The underside is seen when standing within the room, and I don’t need seen pocket holes, and I don’t like having to fill pocket holes on areas that will probably be seen.

To drill the pocket holes, I used my Kreg Pocket Gap Jig. This is the one I have (affiliate hyperlink), and it’s value each penny. If you wish to construct furnishings or cupboards, this instrument is a must have merchandise!
So once more, I drilled three pocket holes on every finish of that piece, ensuring I drilled the holes on the highest of the piece.

At this level, I introduced my scaffolding in to make the entire constructing course of a lot simpler. This is the one I have (affiliate hyperlink — additionally obtainable at Dwelling Depot), and it’s one more factor I purchased lately that I ponder how I lived with out for therefore lengthy!
So standing on the scaffolding, I positioned the plywood piece again on the non permanent ledger boards, pocket holes going through up, and I screwed the piece into the aspect of the tall cupboards.

With that secured in place, it regarded like this. The bow within the center was nonetheless there, however I wasn’t fearful about it at this level. I simply wished to guarantee that it regarded degree with the trim on the prime of the window.

As soon as I used to be certain it regarded degree, I eliminated the non permanent ledger boards. That did depart three nail holes on all sides that I’ll should fill and sand, however I’m okay with that. We DIYers who work alone should do what it takes, and filling and sanding six small nail holes is a small value to pay for getting this job carried out on my own.

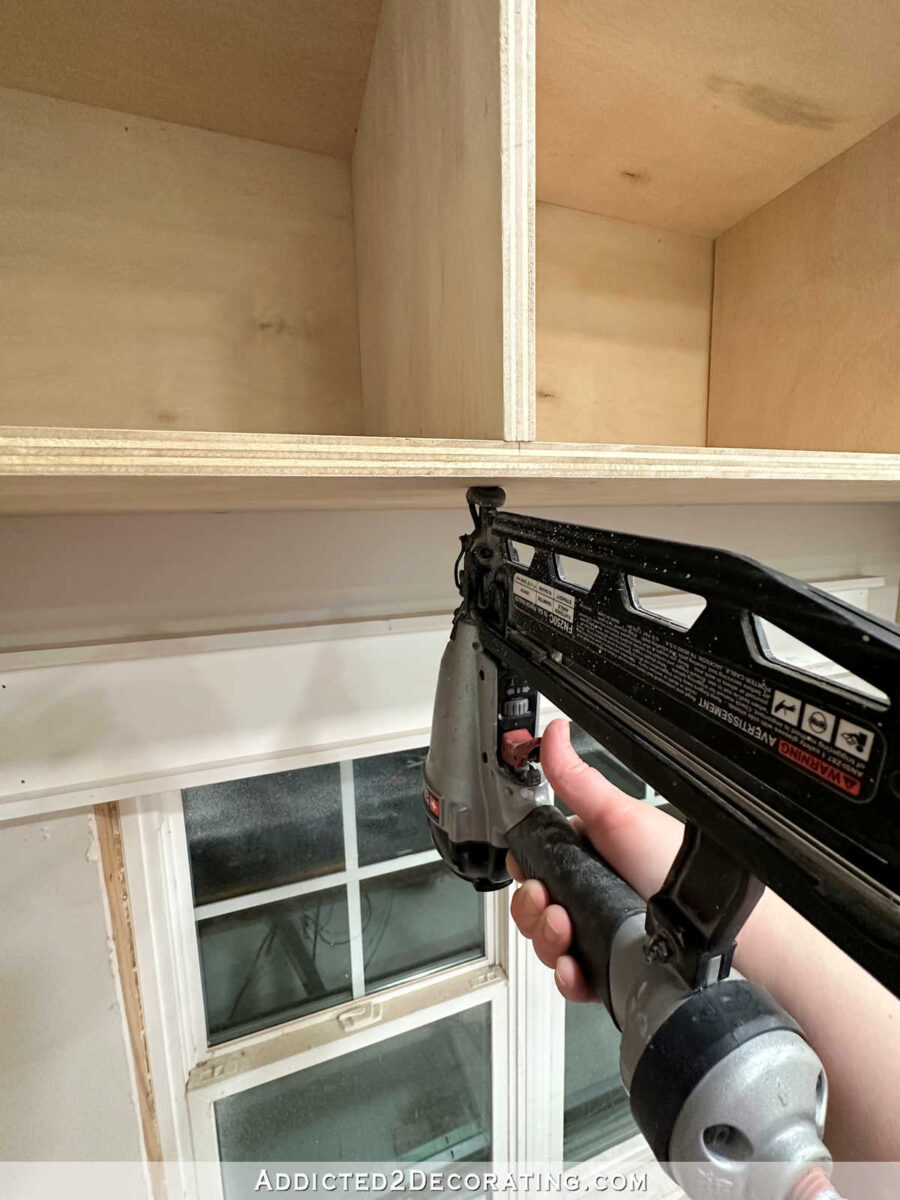
Subsequent, I used my desk noticed to chop the items for the ends. I hooked up these by nailing from the within of this aspect piece into the plywood on the aspect of the aspect cupboard (i.e., within the course my nail gun is pointing beneath).

After which I additionally nailed by means of the underside plywood piece and into the sting of the aspect piece.

After repeating that on the opposite finish, I used to be prepared to chop the again piece to suit inside the 2 finish items. That is the place the bow in that backside board can be corrected. You may see the again piece set into place beneath, and the bow in that backside board continues to be seen.
To safe that again piece, I first nailed by means of the aspect items into the sting of the again piece.

After repeating that on the opposite finish, I nailed by means of the underside piece into the underside fringe of the again piece.

That is what took care of the bow and straightened up the underside plywood piece. You may see that there’s not a niche between the 2 items at this level.

To be clear, apart from the six pocket screws holding the underside piece in place, I constructed your entire factor utilizing 1.5-inch 16-guage nails. I’ve full confidence that these nails will maintain. The type that go in a nail gun are very tough, and actually seize into the wooden. If you happen to’ve ever constructed something utilizing these nails, and needed to take items aside, you understand how sturdy they’re. However you probably have much less confidence than I do in how effectively the nails will maintain, you’ll be able to all the time use wooden glue along with the nails, and even add extra pocket holes to carry the items collectively.
Subsequent, I lower and hooked up the highest piece, nailing it throughout the three sides that sat on the aspect items and the again piece. I nailed by means of the highest and into the perimeters of these three items. At this level, it was actually beginning to appear to be one thing! 😀
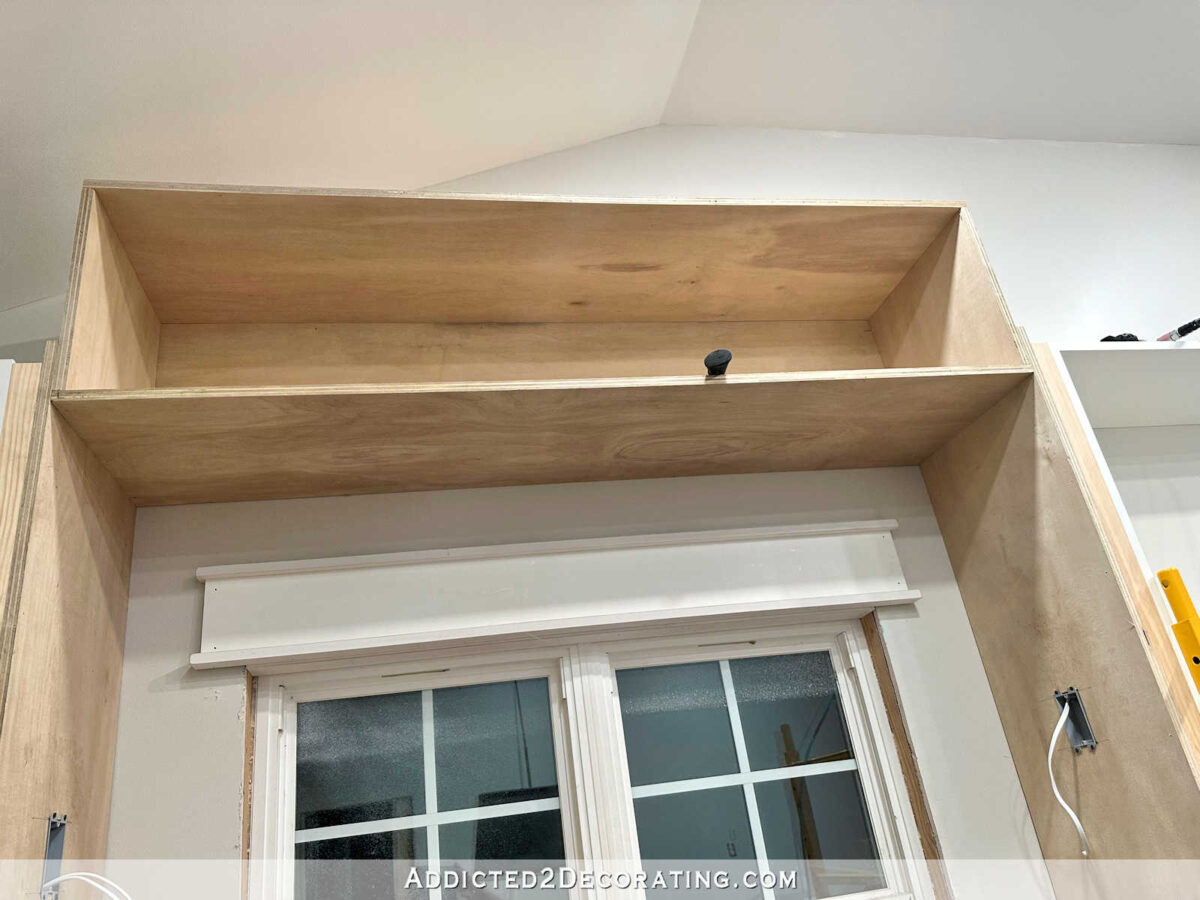
And the ultimate step of the fundamental construct for the cubby bridge was to chop and connect the dividers. I lower them utilizing my desk noticed, after which hooked up them similar to the opposite items.
After measuring and marking for placement of those divider items, I nailed by means of the underside piece into the underside edged of the divider items.
After which I nailed by means of the highest and into the perimeters of the divider items.

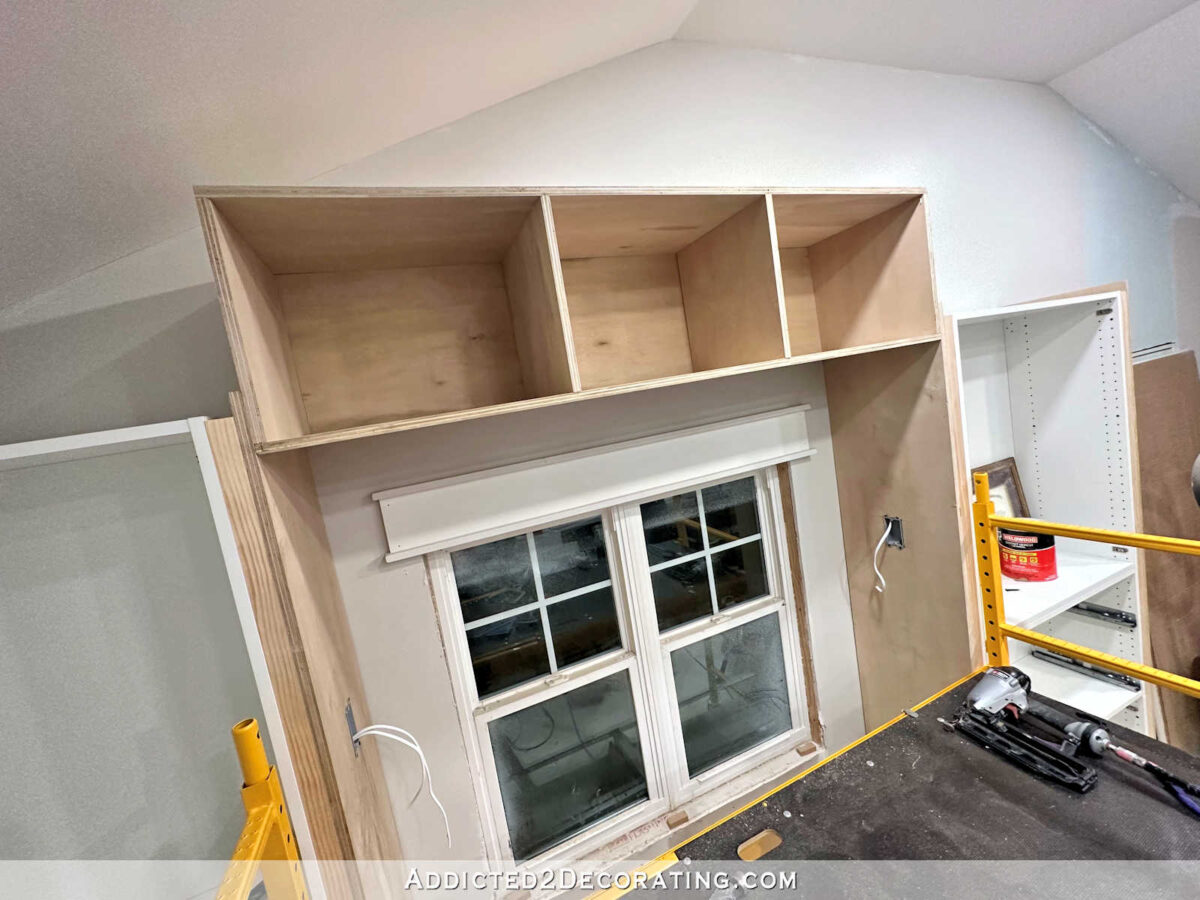
And with that, the fundamental construct was carried out! It’s going to take loads of trim and ending to get this part of cupboards to appear to be I envision in my thoughts, however I’m effectively on my manner!

I so want that each single considered one of you could possibly see this in individual. Footage don’t do it justice. This part of cupboards went from wanting form of small and dwarfed by that tall, vast wall, to wanting very substantial, like it might probably maintain it’s personal towards that vast wall. Typically, extra is certainly higher! 😀 And I feel, when it’s all completed, it should look far more like customized cupboards now.
So keep tuned, as a result of arising subsequent, I’ll get the entire thing trimmed out and prepared for primer and paint. I’m getting actually enthusiastic about seeing this part completed quickly!

Addicted 2 Adorning is the place I share my DIY and adorning journey as I rework and embellish the 1948 fixer higher that my husband, Matt, and I purchased in 2013. Matt has M.S. and is unable to do bodily work, so I do nearly all of the work on the home on my own. You can learn more about me here.
Trending Merchandise


![Rustic Grey Mason Jar Sconces for Home Decor, Decorative Chic Hanging Wall Decor Mason Jars with LED Strip Lights, 6-Hour Timer, Silk Hydrangea, & Iron Hooks for Home & Kitchen Decorations [Set of 2]](https://m.media-amazon.com/images/I/41DPf4UgGOL._SS300_.jpg)
